Before you begin
All the required images should be uploaded to the Image Library so that the same can be used while designing pages.
Create a Page
To create a page:
- Click Add Page.
- Specify a Name and Description for the page.
- Select the page Type from the drop-down list.
The following are the page types:Field Description Standard A standard page can have a header or footer page or can be a stand-alone page that appears in any of the dialogs. Header A header page appears on every page of the script that you create. Footer A footer page appears on every page of the script at the bottom. Starting There must be starting page to begin. DeleteInfo
If you do not have a starting page the script will not work.
Left A left page will appear on every page of the script on the left side of the form. Right A right page will appear on every page of the script on the right side of the form. DeleteInfo
- The header and footer page will appear under Frames.
- You must create all the pages, header, and footer pages first and then map the content, apply conditions.
- You can Delete or Clear page the contents of the page using the Delete Page and Clear Page options but you cannot edit the properties of the page. For example, if you create a Left page and want to change the property to the Right page then you do not have the option to do it. So make sure you plan your pages before creating them.
Script Examples
Scripts can vary ranging from simple to complex, depending on your requirement to accomplish the task of presenting an effective workspace and workflow for your agents. The below example details the procedure of creating a simple script. These are the basic steps for developing a functional desktop for your environment. You can design using Elements from the Design tab. For more information about the design elements, see Design Tab.
To design the page:
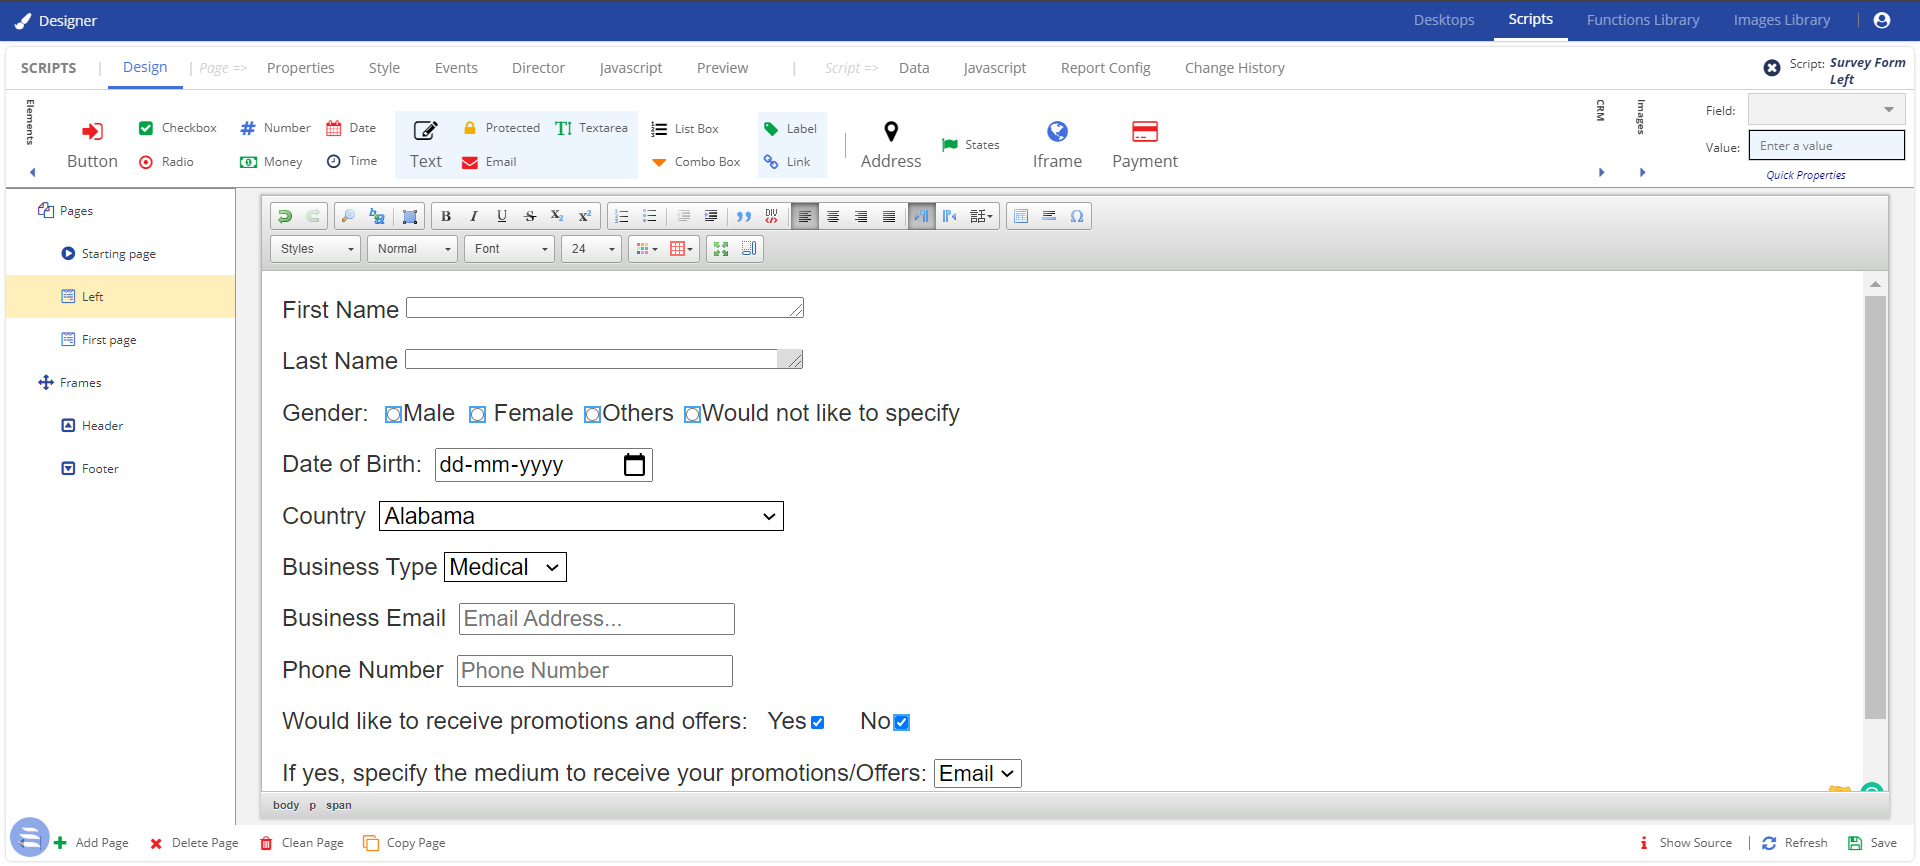
- Position your cursor on the screen and begin typing the text (First Name). You will find the familiar formatting tools in the toolbar of the workspace. With these, you can set the font size, font color, etc.
- To add a text box, drag and drop the
 Text icon to the design area.
 - Use the Style menu to specify the height, width, font size, and other options for the text box.

- Position your cursor on the screen and begin typing the text (Last Name), follow the same steps used for creating the First Name.
- For Gender, add the text in the design area. Add the Radio button in the same manner as you would add a label:
- Position the cursor in the location where you want to add the control.
- Drag and drop the radio button from the elements toolbar.
- After the button, type the text for the response that you wish to capture.
- Repeat the above steps to add as many radio buttons as needed.
- Define the Radio Button’s behavior:
- Select the radio button.
- Go to the Properties tab.
- Select Input Properties.
- For the Date field, drag and drop the date in the same manner as you would add a label and radio button.
- To add the list of countries, drag and drop the States button to the design area.
-
To create a drop-down list of options, drag and drop the Combo Box to the design area. Specify the other options:
- Select the drop-down button.
- Go to the Properties tab.
- Select the Options button.
The Options window appears. - Specify the Name and Value, click Add.
The new options are added. - Click OK.
Data
Allows the user to define a new variable to be used within the script.
Types of Data
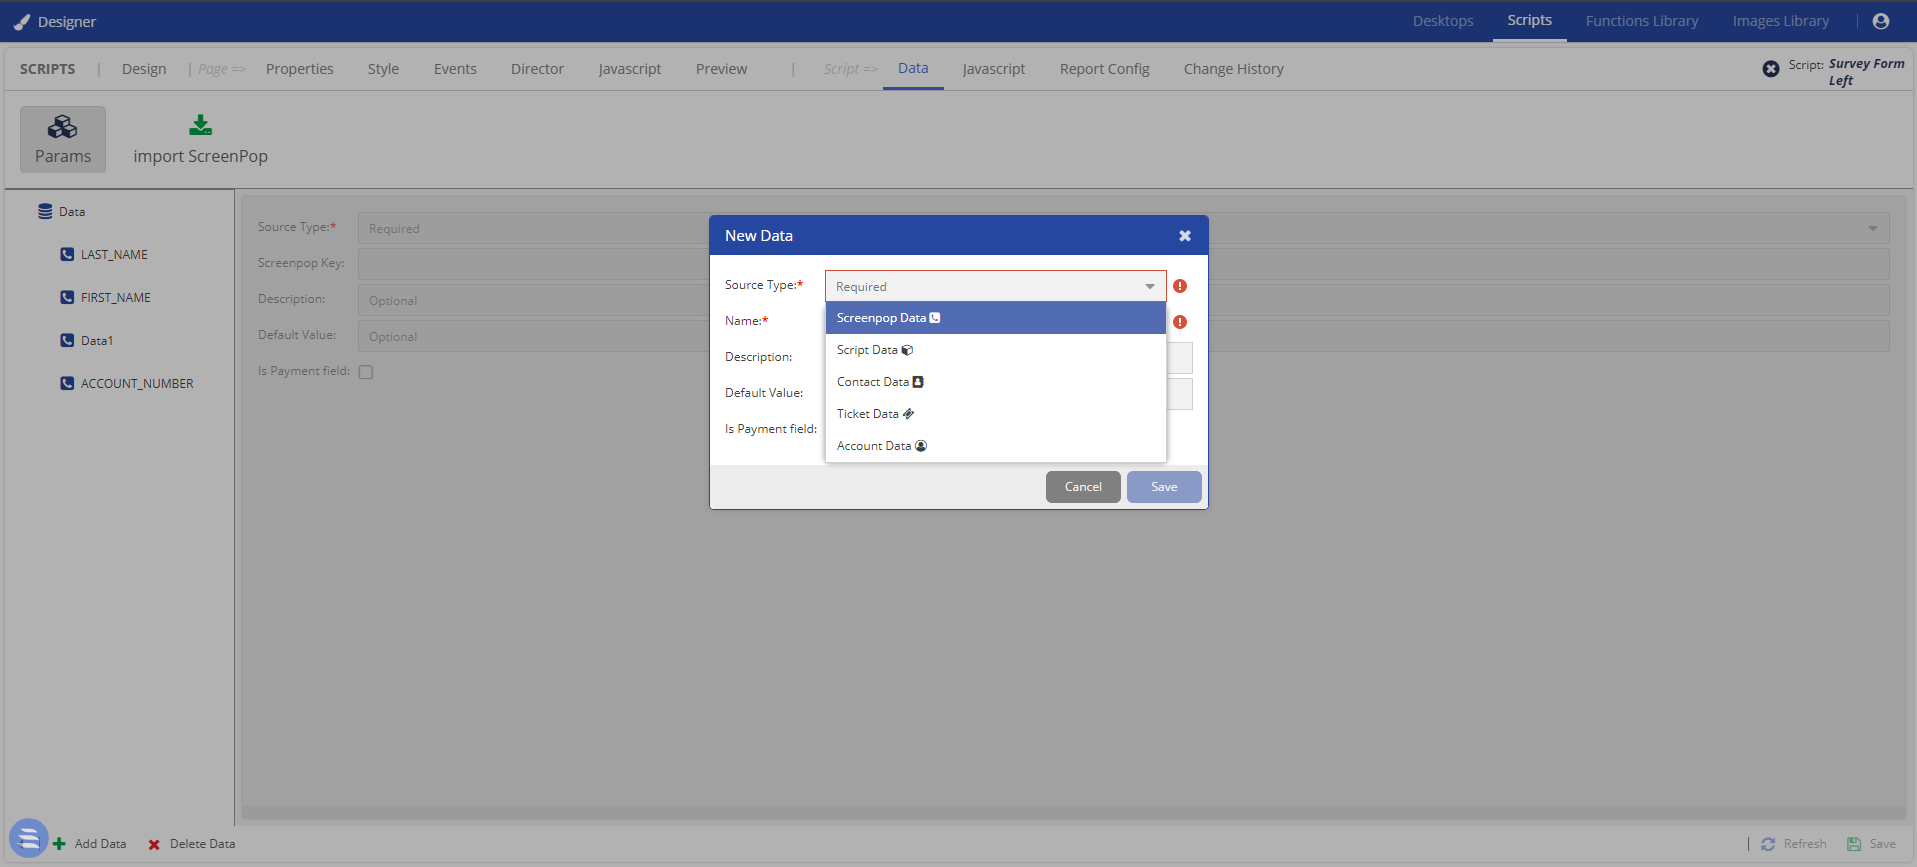
The Data tab contains two options to load the data:
Params: Provides a list of the following options:
- Screenpop and Script Data: You can create your own screenpop and Script data.
- Contact Data: The Data is pulled from the Contact data, you can see the contact parameters. Select the required fields one after the other to the Data pane.
- Ticket Data: The Data is pulled from the Ticket data, you can see the contact parameters. Select the required fields one after the other to the Data pane.
- Account Data: The Data is pulled from the Account data, you can see the contact parameters. Select the required fields one after the other to the Data pane.
Director
The Director tab contains the following events:- All Events: All events option consists of User Events, System Events, and the events that you have created.
- User Events: These are events configured by the admin or managers.
- System Events: These are system configured events.
Adding an Events
Delete
Preview
Using the Preview tab, you can see all the text lines up properly, and the radio buttons and disposition buttons are formatted in a way that makes working on the screen easy for the agents. Being able to see these types of things before you move the script into production is very valuable, as it will help you identify and correct any formatting issues before agents are set to use the script.
To start the preview, go to the Preview tab on the main menu.
You can add data to your preview to simulate various scenarios. Click the Add button in the preview window and add the values you want to test. There is no limit to the number of rows that you can add. You can select the one to use for the preview by clicking on one of the rows of data.
DeleteReport Config
The Agent Desktop Scripting tool also provides additional, advanced functionality. This functionality allows the manager to perform such tasks as managing the output of the data gathered through the script and creating surveys with the tool that includes the use of CATI (Computer Aided Telephone Interviewing) features, such as randomized questions and answers.
The Scripting tool collects all the results from a script during the call. It collects the values of the Button Click, Radio Button, or Checkbox. It also captures any information entered in a Text Field or Text Area. This information is stored in the database and can be retrieved via the Reporting feature in the builder. To access this feature, select the Reporting tab from the main menu in the builder. This tab offers several tools to set up and manage the reporting feature of the Script Builder.
Change History
The Change History tab allows you to view the change history of the selected desktop.
Delete