
Agent phonebooks allow agents to transfer calls to a list of internal and external contacts. Phonebooks are assigned at the Client, Call Center, and Service levels. You can use an agent phonebook for:
- External transfers that support single ten-digit phone numbers and extensions.
- Internal transfers that allow agents to transfer calls to service groups and services.
For example, you can use an agent phonebook to transfer calls to an internal team of multilingual agents, or to an external number for payment verification.
U15 / U17
To set up an agent phonebook, complete the following steps.
- Create a new agent phonebook.
- Add entries to the agent phonebook.
- Assign an agent phonebook from the Client, Call Center, or Service levels.
- Enable phonebook transfer on an agent desktop.
These above steps are explained in more detail in the following sections.
1. Creating a New Agent Phonebook
To create a new agent phonebook:
- Log in to the LiveVox Portal (LVP).
- Navigate to Configure > Agents > Agent Phonebook from the left navigation panel.
- Click Create Agent Phonebook from the Agent Phonebook editor, as shown below.
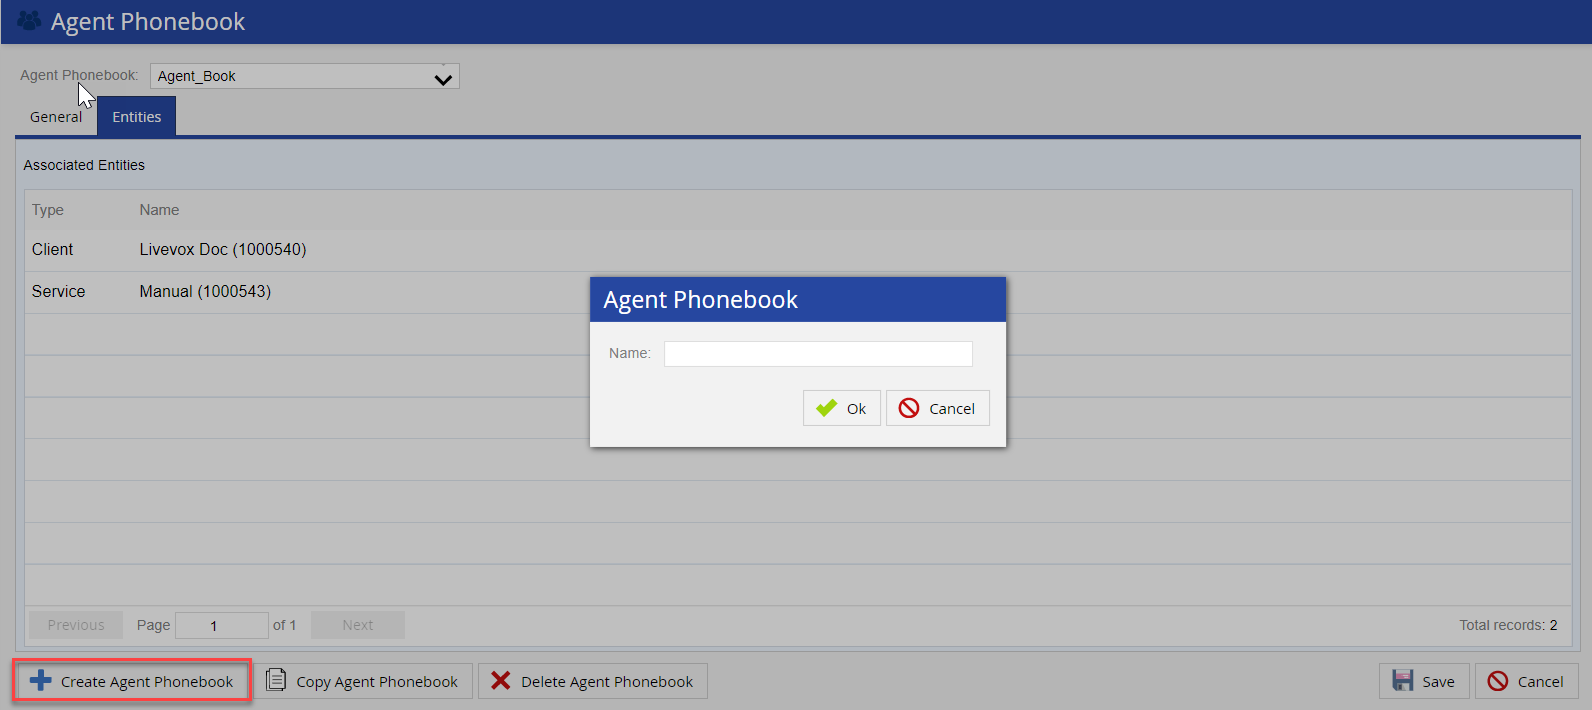
- Enter the name for the new agent phonebook in the Name field.
Click OK. The Agent Phonebook Saved message appears and the agent phonebook is created.
2. Adding Entries to a Phonebook
To add entries to the created agent phonebook, go to the General tab and complete the following steps:
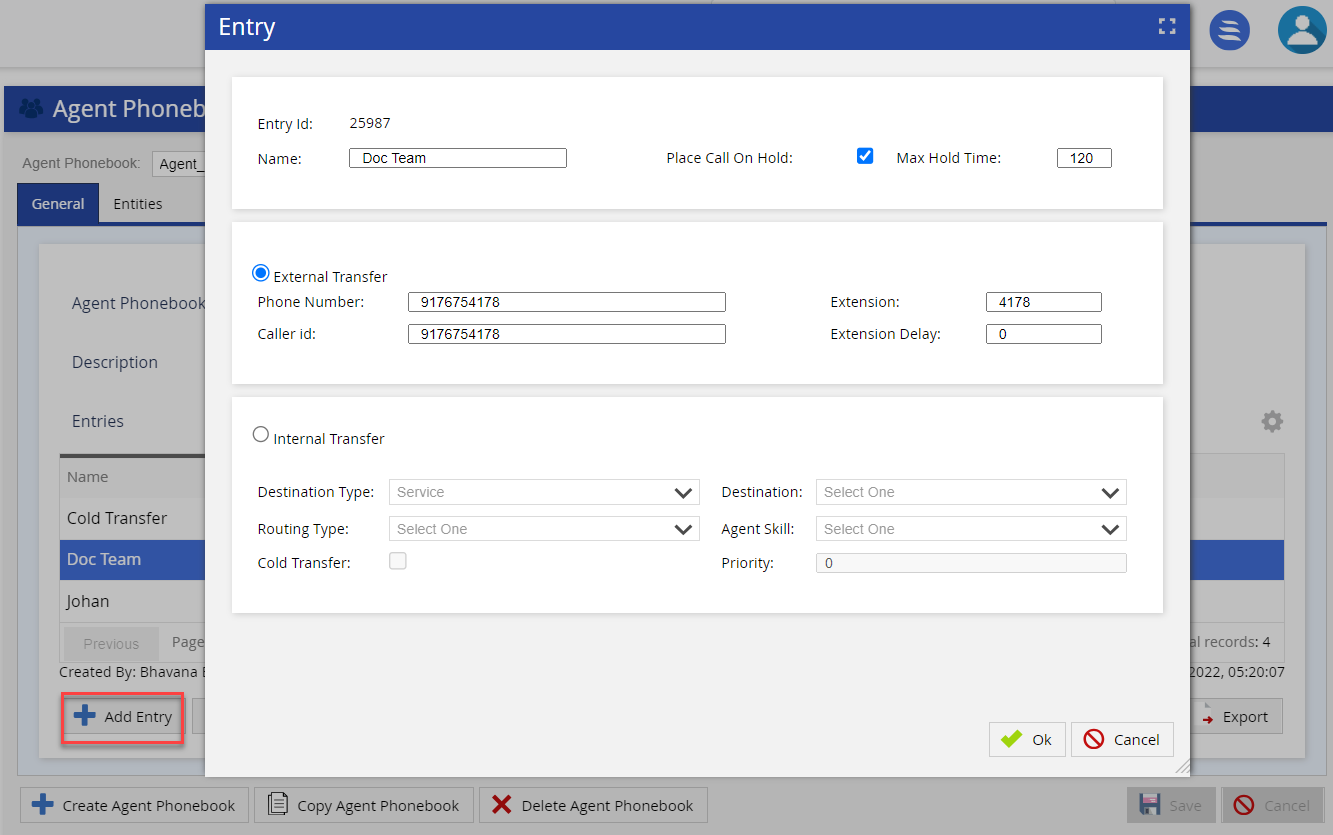
- Click the Add Entry button to display the Add Entry configuration pop-up:

- Specify the required fields.
Section Fields Description General Information Entry Id The identification number of the phonebook entry that is auto-generated after adding the entry. Name The name of the entry (external/internal contact) to be dialed. Place Call On Hold When selected, allows you to place the call on hold. Max Hold Time The maximum amount of time that a call can be on hold in seconds. External Transfer Phone Number The phone number to be dialed for the selected contact or group of contacts. Extension The extension of the phone number to be dialed when required. Caller id When you select an external transfer, the identification number for the selected contact. Extension Delay This field controls the number of milliseconds required to wait when you establish a connection before entering the extension. Internal Transfer Destination Type When selecting an internal transfer, the destination type can be service or service group. Destination Depending on the destination type selected, you can select a specific service group or service. Routing Type The routing type is used when dialing the selected contact. Agent Skill The agent skill assigned to the internal transfer. Cold Transfer If checked, it allows agents to transfer a call the same way as with any internal phonebook transfer, except that the receiving party does not have to be available at the time of the transfer. The caller remains on hold, added to the hold queue, and given priority based on what is configured in the phonebook entry. Priority The priority assigned to the internal transfer call. - Click Ok.
- Click Save from the General tab window.
3. Assigning an Agent Phonebook from the Client, Call Center, or Service Level
You can assign agent phonebooks at the Client, Call Center, or Service levels from their respective editors. Phonebooks can be assigned at all levels. However, the priority is as follows:
- Service
- Call Center
- Client
Assigning an Agent Phonebook at the Service Level
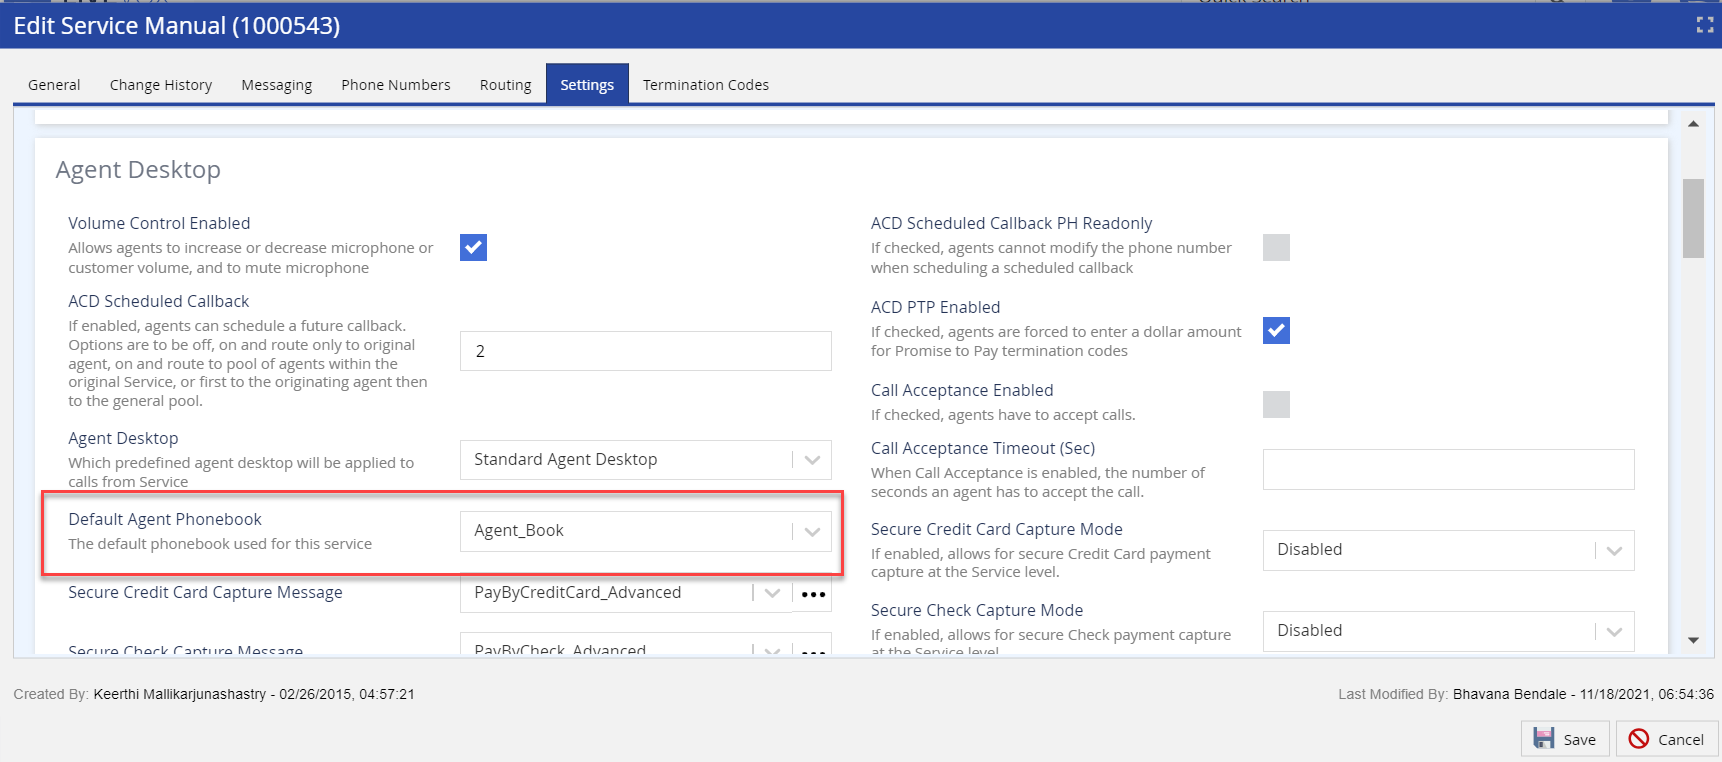
To assign an agent phonebook from the Service level, navigate to Configure > Services > Services > Settings > Agent Desktop and select the required phonebook from the Default Agent Phonebook drop-down list.

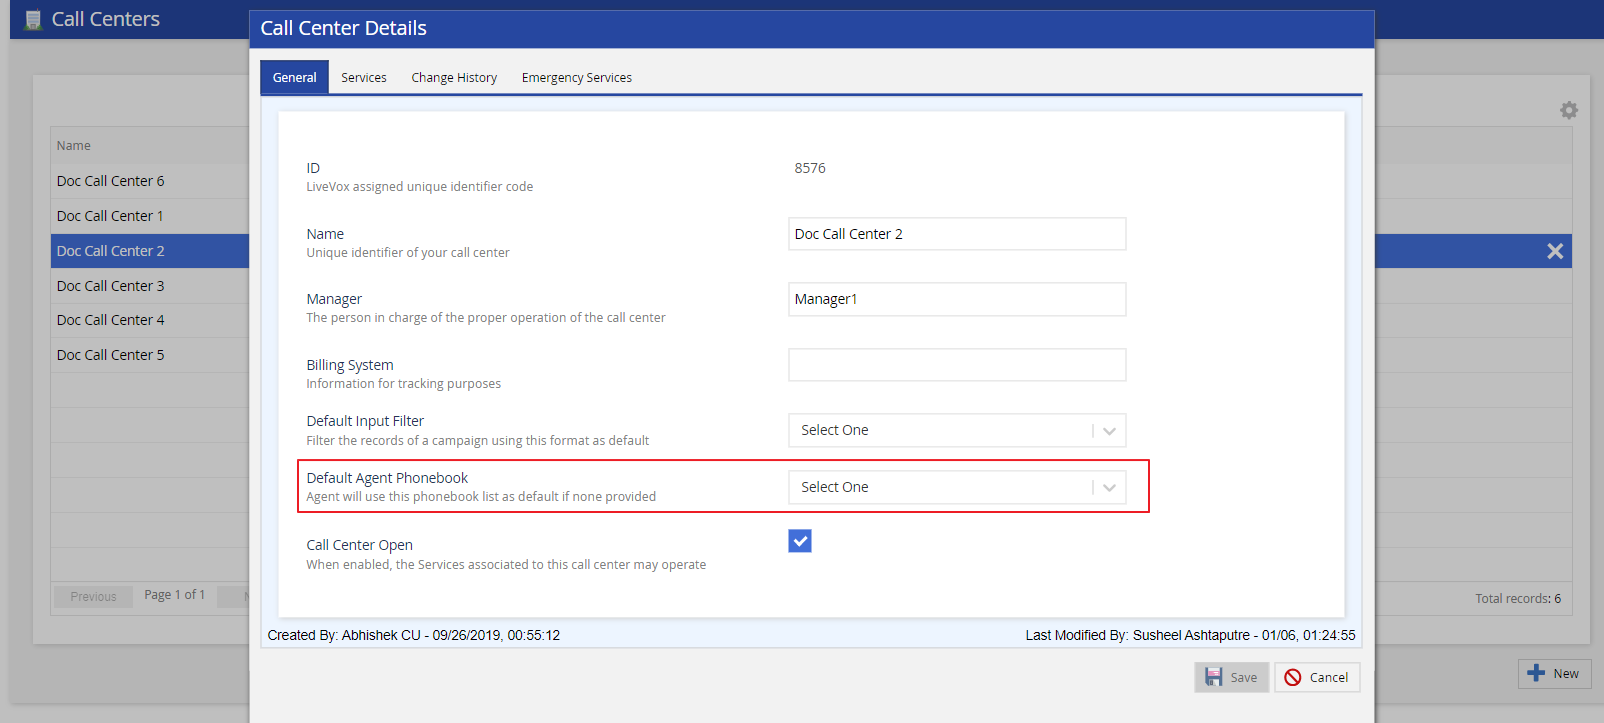
Assigning an Agent Phonebook at the Call Center Level
To assign an agent phonebook from the Call Center level, navigate to Configure > Services > Call Centers > General and select the required phonebook from the Default Agent Phonebook drop-down list.
Assigning an Agent Phonebook at the Client Level
To assign an agent phonebook at the Client level, navigate to Configure > Services > Client > Portal and select the required phonebook from the Default Agent Phonebook drop-down list.

4. Enabling a Phonebook Transfer on an Agent Desktop
To enable an agent to transfer a call using a phonebook, navigate to Configure > Agents > Agent Desktop > General tab on LVP. Select the Phonebook Transfer Enabled checkbox to allow agents to transfer calls to predefined phone book entries.
![]()
LV 19 / Fall 23
To set up an agent phonebook, complete the following steps.
- Create a new agent phonebook.
- Add entries to the agent phonebook.
- Assign an agent phonebook from the Client, Call Center, or Service levels.
- Enable phonebook transfer on an agent desktop.
These above steps are explained in more detail in the following sections.
1. Creating a New Agent Phonebook
To create a new agent phonebook:
- Log in to the LiveVox Portal (LVP).
- Navigate to Configure > Agents > Agent Phonebook from the left navigation panel.
- Click Create Agent Phonebook from the Agent Phonebook editor, as shown below.

- Enter the name for the new agent phonebook in the Name field.
Click OK. The Agent Phonebook Saved message appears and the agent phonebook is created.
2. Adding Entries to a Phonebook
To add entries to the created agent phonebook, go to the General tab and complete the following steps:
- Click the Add Entry button to display the Add Entry configuration pop-up:
- Specify the required fields.
Section Fields Description General Information Entry Id The identification number of the phonebook entry that is auto-generated after adding the entry. Name The name of the entry (external/internal contact) to be dialed. Place Call On Hold When selected, allows you to place the call on hold. Max Hold Time The maximum amount of time that a call can be on hold in seconds. External Transfer Phone Number The phone number to be dialed for the selected contact or group of contacts. Extension The extension of the phone number to be dialed when required. Caller id When you select an external transfer, the identification number for the selected contact. Extension Delay This field controls the number of milliseconds required to wait when you establish a connection before entering the extension. Internal Transfer Destination Type When selecting an internal transfer, the destination type can be service or service group. Destination Depending on the destination type selected, you can select a specific service group or service. Routing Type The routing type is used when dialing the selected contact. Agent Skill The agent skill assigned to the internal transfer. Cold Transfer If checked, it allows agents to transfer a call the same way as with any internal phonebook transfer, except that the receiving party does not have to be available at the time of the transfer. The caller remains on hold, added to the hold queue, and given priority based on what is configured in the phonebook entry. Priority The priority assigned to the internal transfer call. - Click Ok.
- Click Save from the General tab window.
3. Assigning an Agent Phonebook from the Client, Call Center, or Service Level
You can assign agent phonebooks at the Client, Call Center, or Service levels from their respective editors. Phonebooks can be assigned at all levels. However, the priority is as follows:
- Service
- Call Center
- Client
Assigning an Agent Phonebook at the Service Level
To assign an agent phonebook from the Service level, navigate to Configure > Services > Services. Double Click the required service from the service list. Go to Settings > Agent Desktop and select the required phonebook from the Default Agent Phonebook drop-down list.
Assigning an Agent Phonebook at the Call Center Level
To assign an agent phonebook from the Call Center level, navigate to Configure > Services > Call Centers. Double click the required call center from the list. From the General tab, select the required phonebook from the Default Agent Phonebook drop-down list.
Assigning an Agent Phonebook at the Client Level
To assign an agent phonebook at the Client level, navigate to Configure > Services > Client > Portal and select the required phonebook from the Default Agent Phonebook drop-down list.

4. Enabling a Phonebook Transfer on an Agent Desktop
To enable an agent to transfer a call using a phonebook, navigate to Configure > Agents > Agent Desktop. Double click the required agent desktop from the list. From General tab, select the Phonebook Transfer Enabled checkbox to allow agents to transfer calls to predefined phone book entries.
![]()