
You can add termination codes to specific services or groups of services to indicate the reason a call has been terminated.
U17
Adding New Termination Codes
- Log in to the LiveVox Portal.
- Go to Configure > Agents > Termination Codes.
- Click Add.
The Termination Code pop-up appears.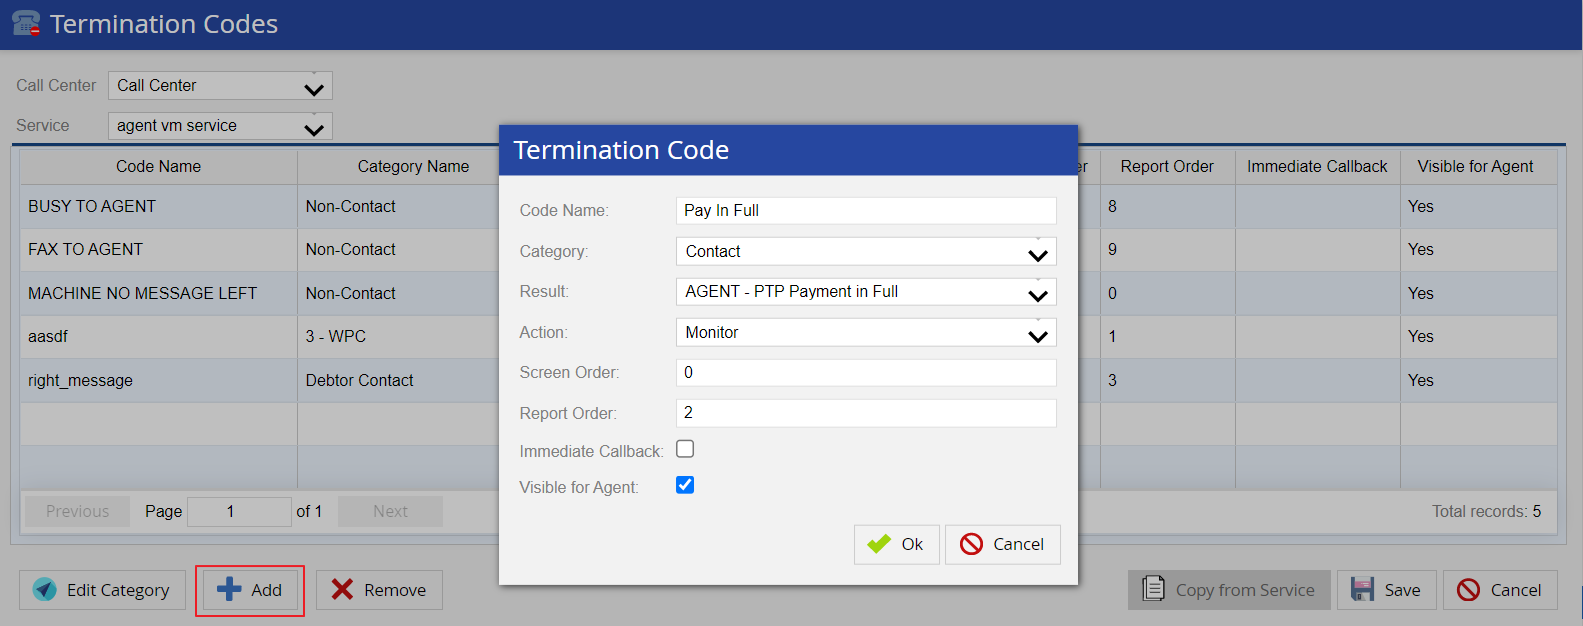
-
Specify values in the following fields.
Field Descriptions Code Name Specify the name of the code. Category Select a category for the termination code. Similar termination codes on the agent desktop are grouped together to form a category. Result Select the result. The result consists of internal result mapping (Tool For Health (TFH) result) that LiveVox can associate with the termination code. Action Disconnect a call or leave a message after the termination code is selected. Screen Order Currently disabled, termination codes are displayed in alphabetical order within their category section. Report Order The order the termination codes are displayed on the Call Detail Report (scroll right to view this column). Leave as default, or assign a value between 1- 126. Immediate Callback When checked, allows agents to do immediate callbacks after selecting the termination code. Visible for Agent Indicates whether the termination codes are visible to the agent. - Click Ok.
The new row is highlighted in green.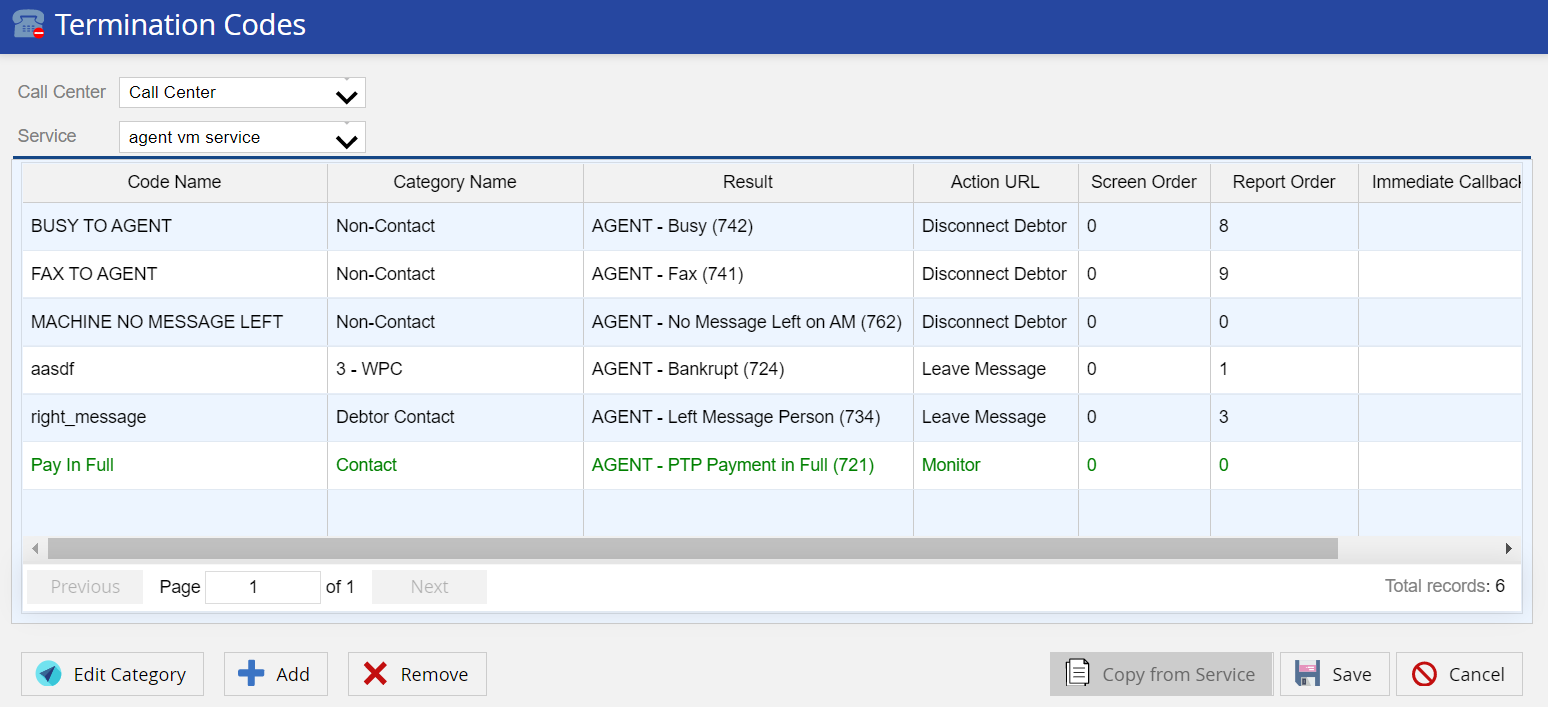
- Click Save.
Requesting a New Termination Code
Termination codes (or disposition codes) identify the possible outcomes of the calls agents make and receive. Agents must select a termination code to complete one call and move on to the next call. You can assign termination codes to services and allow specific services/groups of services to have unique termination code options for different types of businesses and for clients to capture specific information (for example, payment made fully, wrong part connect, and so on).
DeleteLV19 / Fall 23
Adding New Termination Codes
- Log in to the LiveVox Portal.
- Go to Configure > Agents > Termination Codes.
- Click Add.
The Termination Code pop-up appears.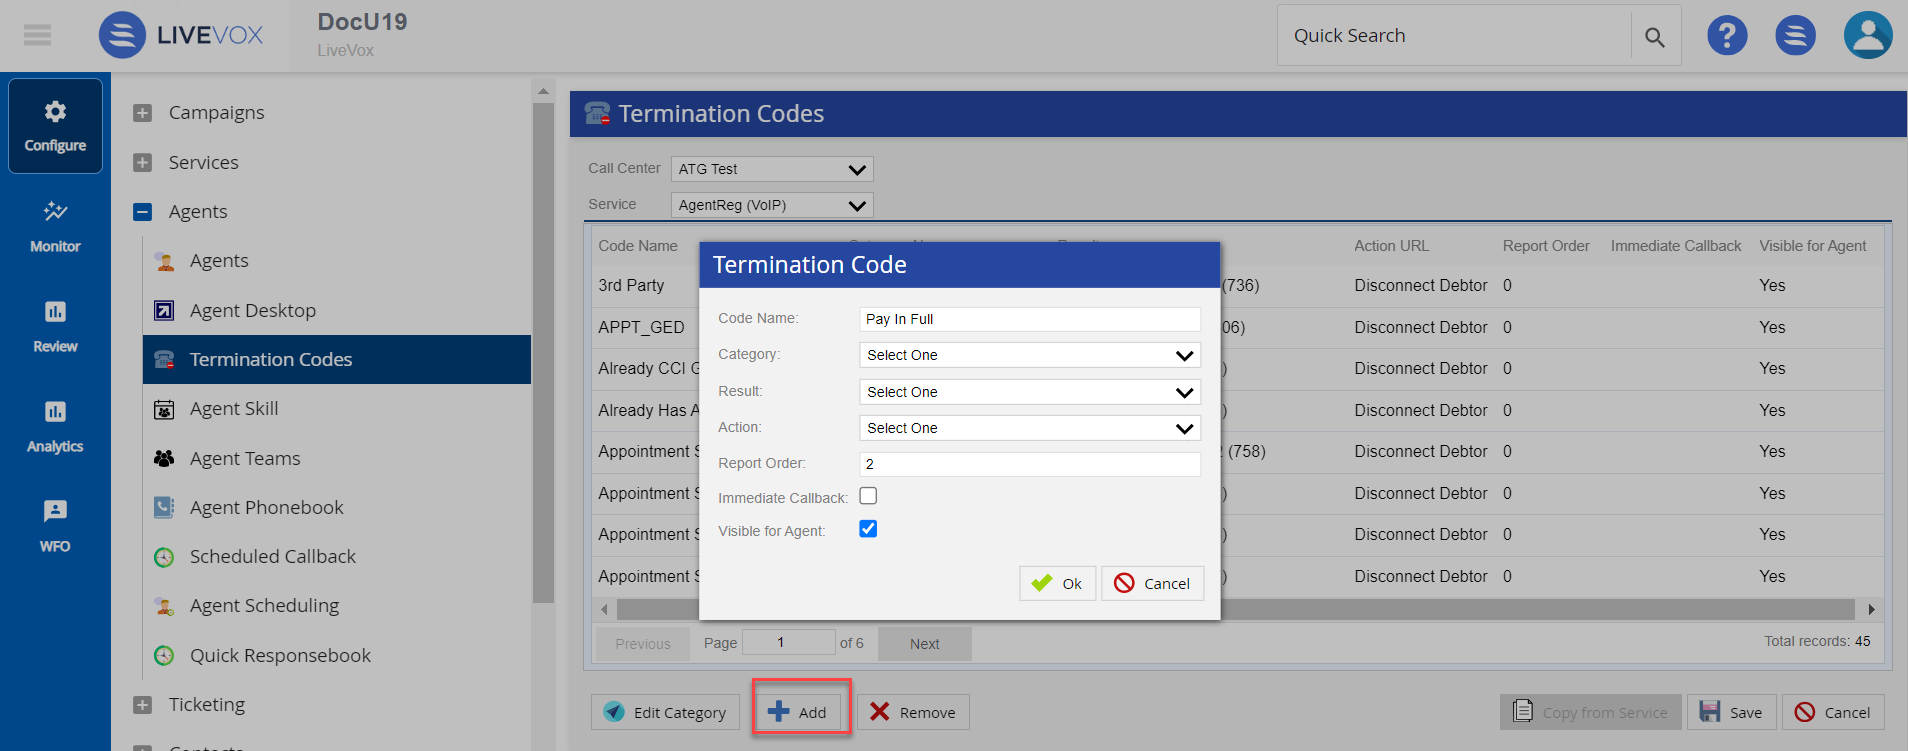
-
Specify values in the following fields.
Field Descriptions Code Name Specify the name of the code. Category Select a category for the termination code. Similar termination codes on the agent desktop are grouped together to form a category. Result Select the result. The result consists of internal result mapping (Tool For Health (TFH result)) that LiveVox can associate with the termination code. Action Disconnect a call or leave a message after the termination code is selected. Screen Order Currently disabled, termination codes are displayed in alphabetical order within their category section. Report Order The order the termination codes are displayed on the Call Detail Report (scroll right to view this column). Leave as default, or assign a value between 1- 126. Immediate Callback When checked, allows agents to do immediate callbacks after selecting the termination code. Visible for Agent Indicates whether the termination codes are visible to the agent. - Click Ok.
The new row is highlighted in green.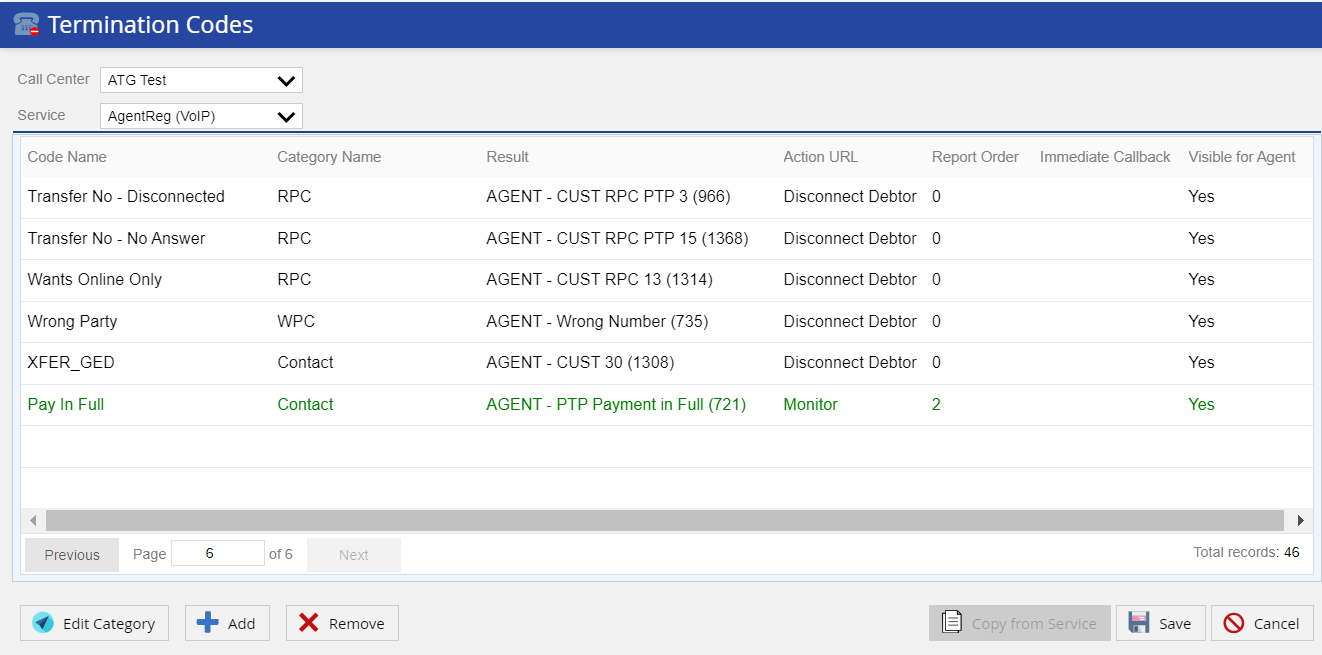
- Click Save.
Requesting a New Termination Code
Termination codes (or disposition codes) identify the possible outcomes of the calls agents make and receive. Agents must select a termination code to complete one call and move on to the next call. You can assign termination codes to services and allow specific services/groups of services to have unique termination code options for different types of businesses and for clients to capture specific information (for example, payment made fully, wrong part connect, and so on).
DeleteFall 24
Adding New Termination Codes
- Log in to the SmartReach Portal.
- Go to Configure > Agents > Termination Codes.
- Click Add.
The Termination Code pop-up appears.
-
Specify values in the following fields.
Field Descriptions Code Name Specify the name of the code. Category Select a category for the termination code. Similar termination codes on the agent desktop are grouped together to form a category. Result Select the result. The result consists of internal result mapping (Tool For Health (TFH result)) that SmartReach can associate with the termination code. Action Disconnect a call or leave a message after the termination code is selected. Report Order The order the termination codes are displayed on the Call Detail Report (scroll right to view this column). Leave as default, or assign a value between 1- 126. Immediate Callback When checked, allows agents to do immediate callbacks after selecting the termination code. Visible for Agent Indicates whether the termination codes are visible to the agent. - Click Ok.
The new row is highlighted in brown.
- Click Save.
Requesting a New Termination Code
Termination codes (or disposition codes) identify the possible outcomes of the calls agents make and receive. Agents must select a termination code to complete one call and move on to the next call. You can assign termination codes to services and allow specific services/groups of services to have unique termination code options for different types of businesses and for clients to capture specific information (for example, payment made fully, wrong part connect, and so on).
Delete