
After you create contacts, you can customize how the contact information is displayed. You can add fields (for example, payment balance, contact created date); restrict editors (select which users can edit the contact view); restrict visibility (select which users can see the contacts).
To customize contacts views:
U17
- Log in to the LiveVox Portal (LVP).
- Click the Configure tab, and then click Contacts > Contact Views.
- Double-click the contact you want to customize.
The Design tab is displayed.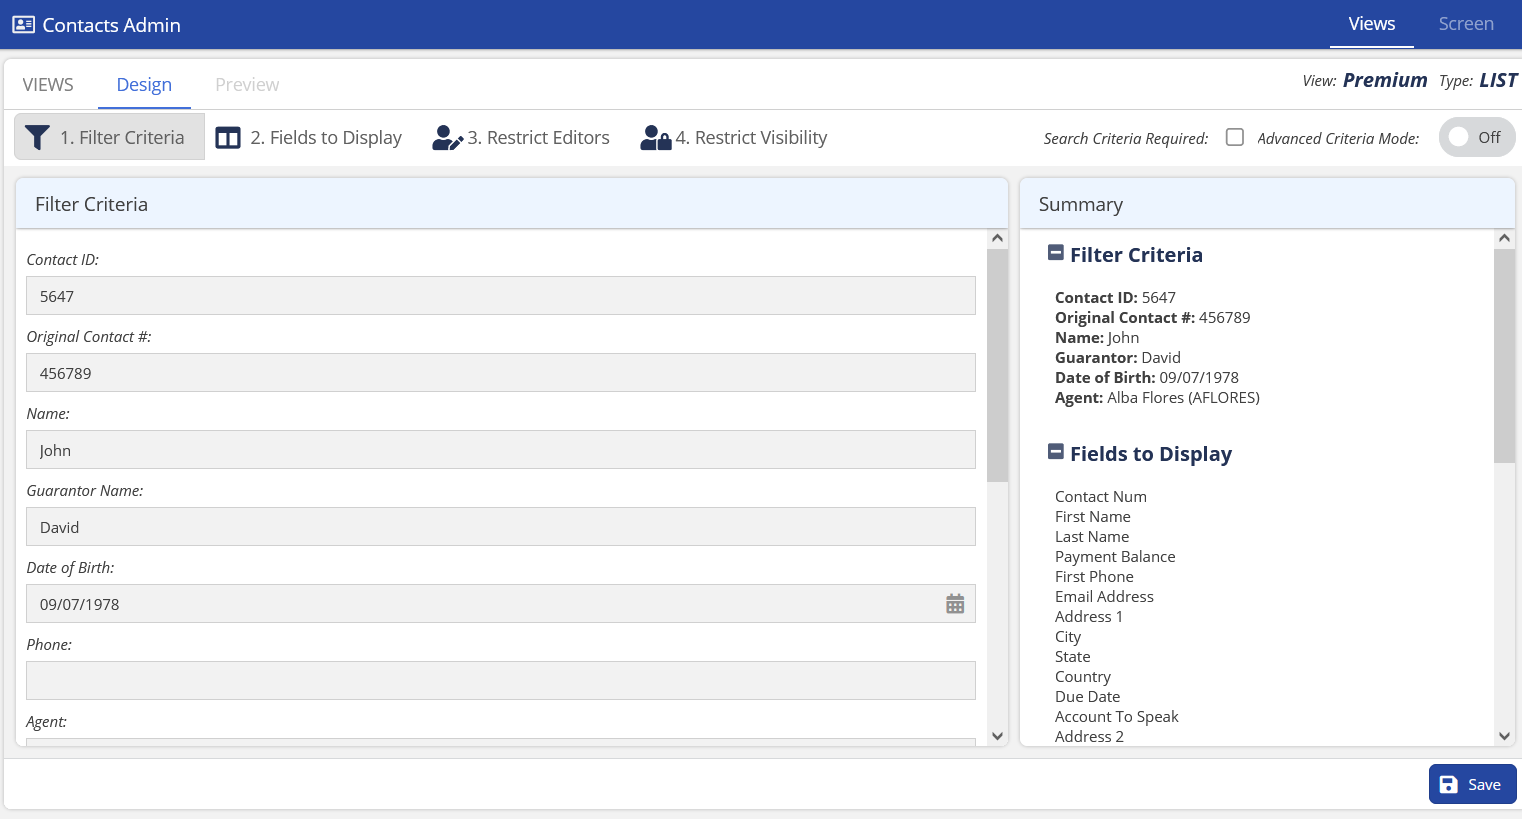
- In the Filter Criteria subtab, specify the values on which you want the contact records to be filtered.
Note
For information about how to add advanced filter criteria, see Using the Advanced Filter Criteria.
- In the Fields to Display subtab, select the fields that you want to see for this contact.
The fields that you selected appear as columns for the specific contact.
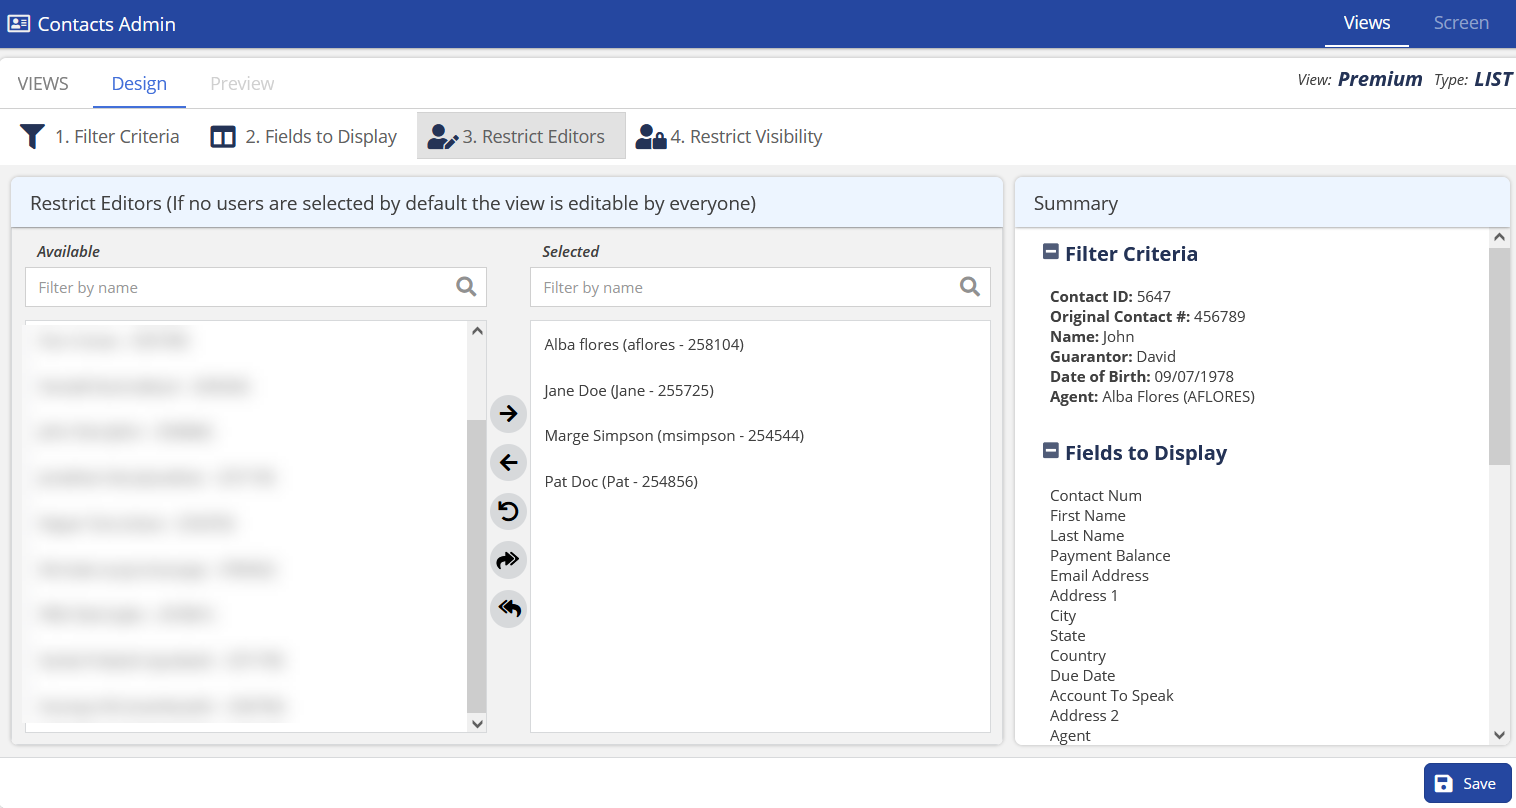
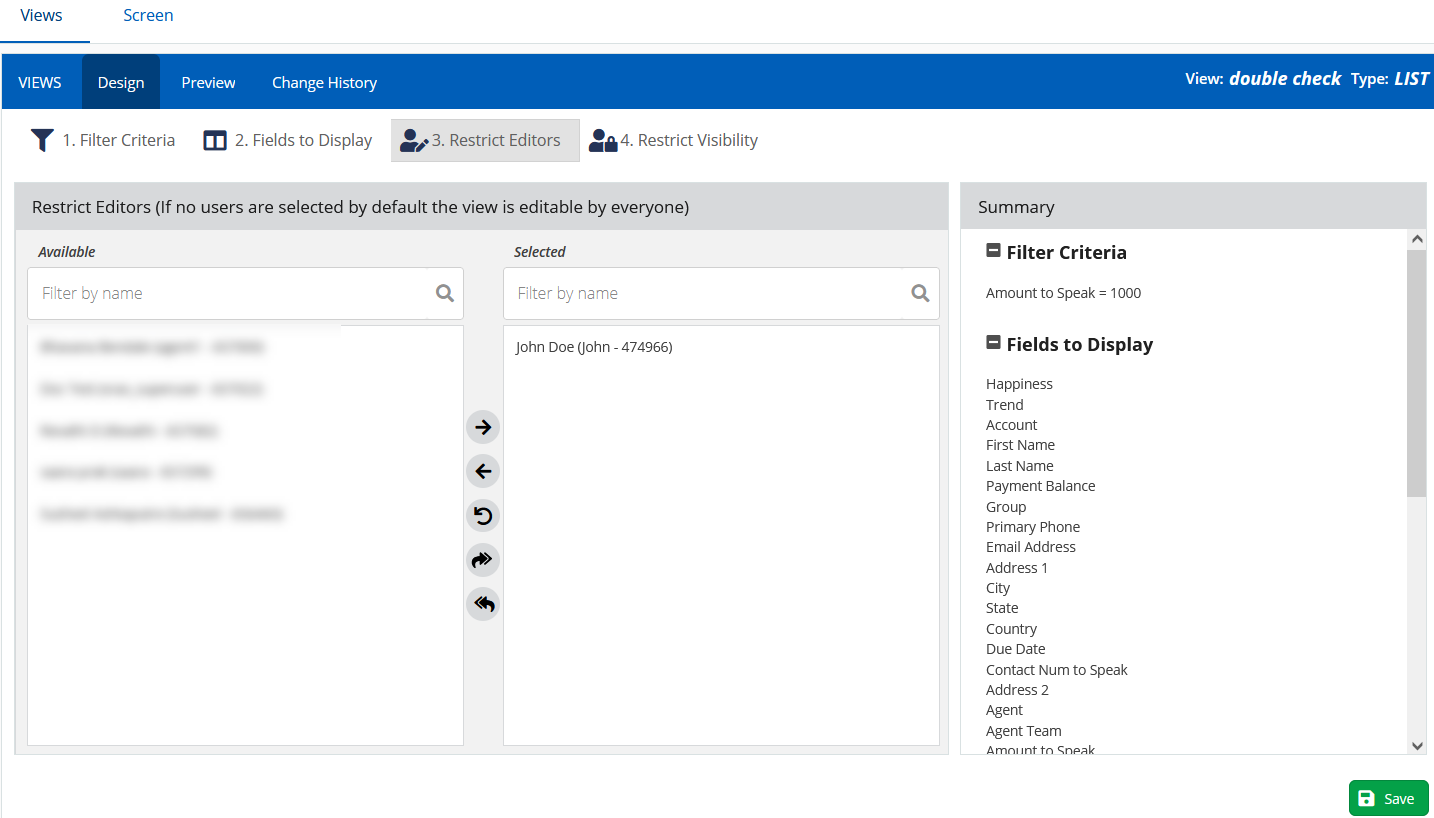
- In the Restrict Editors subtab, select which users can modify the contact view.
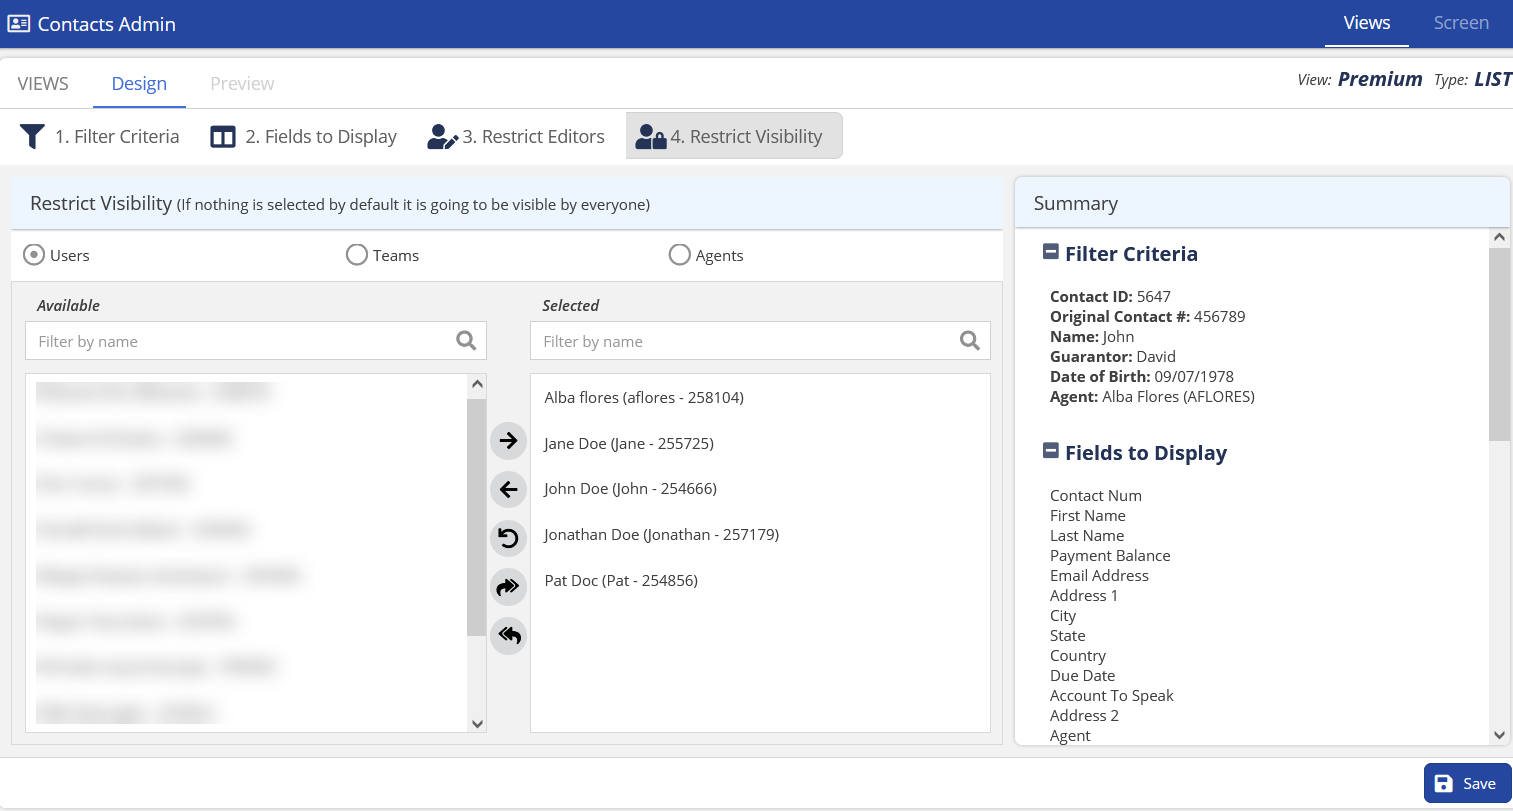
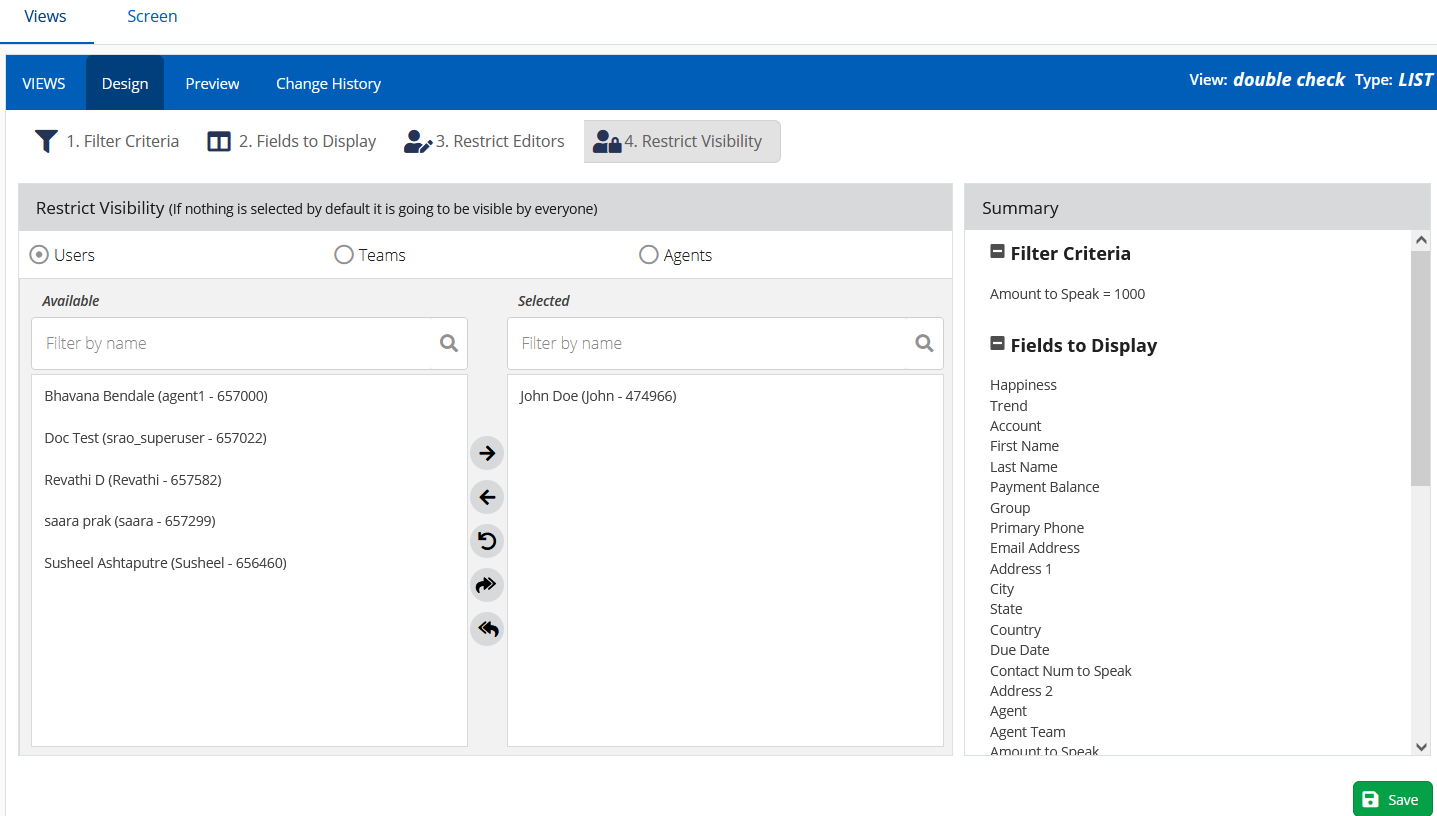
- In the Restrict Visibility subtab, select which users can see the contact view.
- (Optional). Click the Preview tab to see the fields that you have added.
- Click Save.
U19
- Log in to the LiveVox Portal (LVP).
- Click the Configure tab, and then click Contacts > Contact Views.
- Double-click the contact you want to customize.
The Design tab is displayed.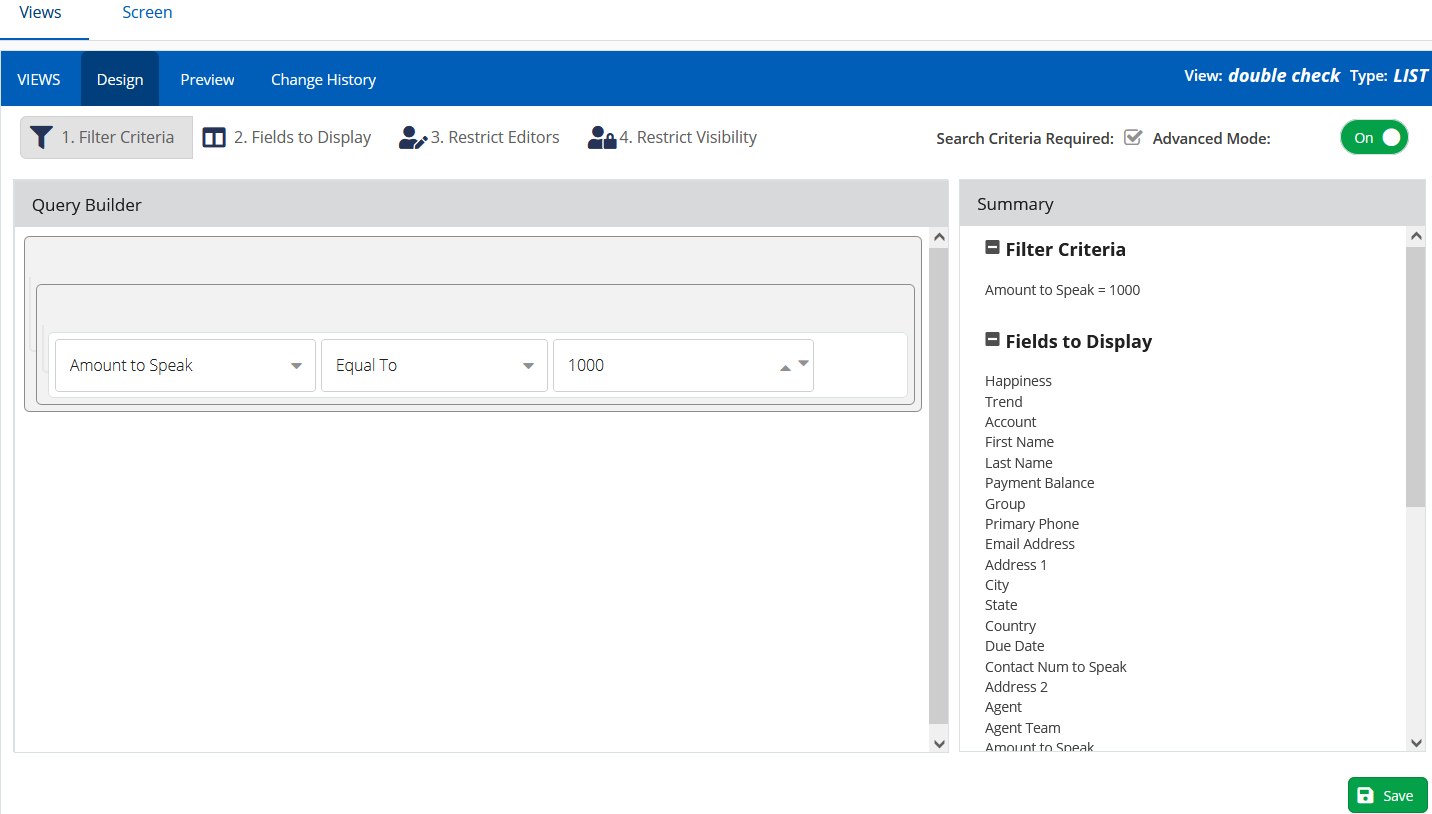
- In the Filter Criteria subtab, specify the values on which you want the contact records to be filtered.
Note
For information about how to add advanced filter criteria, see Using the Advanced Filter Criteria.
- In the Fields to Display subtab, select the fields that you want to see for this contact.
The fields that you selected appear as columns for the specific contact.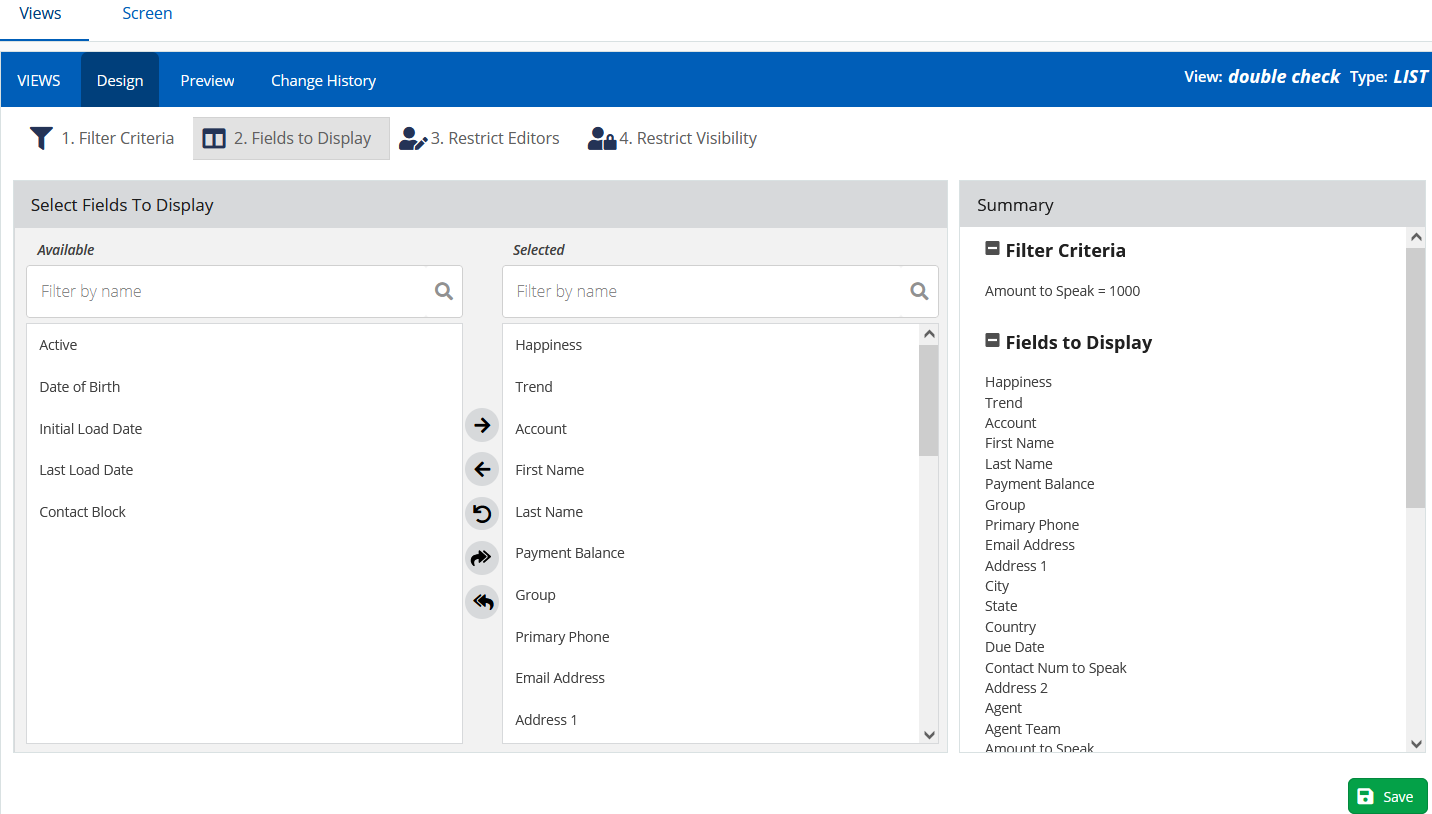
- In the Restrict Editors subtab, select which users can modify the contact view.
- In the Restrict Visibility subtab, select which users can see the contact view.
- (Optional). Click the Preview tab to see the fields that you have added.
- Click Save.