Work-From-Home Guide
Learn how to set up your Agents and Administrators for success when working from home
Table of Contents
Because SmartReach is a cloud-based product, Users and Agents have the freedom to work from anywhere with a stable internet connection. We've put together a quick reference guide for any SmartReach customer who wishes to utilize this flexibility.
Minimum System Requirements
As with any software, the LiveVox suite of products has minimum hardware and bandwidth requirements in order to function optimally. We've put together a list of those requirements below:
Minimum Requirements
Agent Desktop Native
| Hardware | Processor | 256 Mhz |
| RAM | 256 MB | |
| Display | Minimum resolution of at least 1024 x 768 | |
| Peripherals |
|
|
| Software | Operating System |
|
| Environment |
|
|
| Security | SIP/HTTPS | TLSv1.2 |
| RTP | AES-128-CM, SHA1 80 | |
| Network | Codec | Opus |
| Codec Bandwidth | Opus is a variable rate codec, on average users +25 kbps | |
| Web Traffic and Voice bandwidth | 80 kbps (55kbps for data +25 kbps for voice) |
Administrator (User) Systems
| Specifications | LiveVox Portal (LVP) Desktop | Mobile | Tablet | |
| Hardware | Processor | 1 Ghz or faster 32-bit (x86) or 64-bit (x64) | N/A | N/A |
| RAM | 2 GB | 1 GB | 1 GB | |
| Display | A screen with a resolution of at least 1280 x 1024 px | A screen with a resolution of at least 1136 x 640 (300+ ppi) | 7"+ display with a resolution of at least 1024 x 768 (300+ ppi) | |
| Peripherals |
|
N/A | N/A | |
| Software | Operating System |
|
Android 5.1+, iPhone 6+ | Android 4.4+, iOs 10+, Windows 8+ |
| Environment | Citrix, Microsoft Server 2012R2, 2016 | |||
| Internet Browser | Latest versions of Microsoft Edge, Google Chrome, Mozilla Firefox, and Safari 9+ | Google Chrome (latest version), Firefox (latest version), Safari 600+ | Microsoft Edge, Google Chrome (latest version), Firefox (latest version), Safari 600+ | |
| Network | Bandwidth | Minimum bandwidth 500 Kbps | Minimum bandwidth 250 Kbps | Minimum bandwidth 500 Kbps |
Subnet IPs (White-Listing) and Agent Impact
For security purposes, SmartReach offers the ability to restrict User and Agent access to specific IP addresses. If this feature is being utilized (called Subnet IP, or white-listing), work-from-home Users and Agents may run into difficulties accessing SmartReach from unrecognized IP addresses. If your Users or Agents are having difficulty accessing the platform:
- Confirm if Subnet IPs are being used. Navigate to Client > Security and see if IP addresses are listed in the Subnet IP section. If the list is blank (as seen in our example below), SmartReach may be accessed from any IP address. If the list is populated with an IP address, only those IP addresses can access the SmartReach platform:

-
If Subnet IPs are being used, confirm if your IP address is on the list. A common practice when using Subnet IP for office environments would be to whitelist a specific office IP address, restricting SmartReach access to only those at certain locations. If an Agent attempts to access SmartReach outside of this office environment (such as from home) at a new, unique IP address: their access will result in an error (seen below). Users accessing SmartReach from a designated IP can add new IP addresses to your Subnet IP list. If this is not possible, contact our Customer Care team so that we may assist in having the new IP address added:

Installing Agent Desktop Native (ADN)
After downloading the Agent Desktop Native (ADN) application, you can install the ADN application on your system by following one of the procedures below depending on the platform that you use:
ADN 7.6.1 and ADN 7.7
Installing the ADN Application in Windows
To install the ADN application on a Windows system, use the following procedure:
- From the Download folder, run the agent-desktop-native-<version>.exe file to launch the installer. The following message appears.
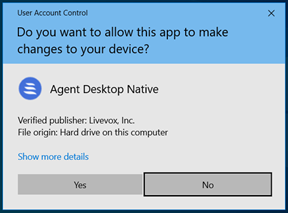
- Click the Yes button to begin the installation process. An Agent Desktop Native Setup window appears.
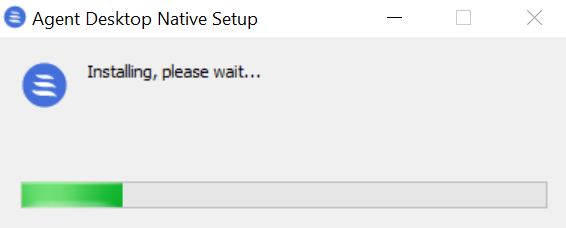
- The application is installed on your local machine. You can launch the Agent Desktop Native application from the applications folder, or the icon that appears on your desktop:

Installing ADN Application Using the MSI Package
To install ADN on many systems at once, an administrator can use the Microsoft Software Installer (MSI) package that supports provisioning using the config.mst and config.json files.
Info
- This type of installation applies only to the Windows platform.
- Contact the LiveVox Customer Care Team for the MSI package required to install the Agent Desktop Native application.
To install the ADN application using the MSI package, complete the following steps:
- Copy the Microsoft installer package ADN 7.6.1.msi (for ADN 7.7 version use ADN 7.7.msi) and config.mst file to a specific folder. For example, C:\temp\ADNInstall\
- Create the config.json file using Notepad. Save the file in the same folder and add {"clientCode":"Value"}to the file. Update the Value field with your appropriate Client code. For example, {"clientCode":"DocU17"}.
- Open the Windows cmd prompt and go the MSI package directory. For example, cd C:\temp\ADNInstall\.
- Execute the following command, as per the required version:
msiexec /i agent-desktop-native-7.6.1.msi TRANSFORMS=config.mst
or
msiexec /i agent-desktop-native-7.7.0.msi TRANSFORMS=config.mst
Installing the ADN Application on a Mac
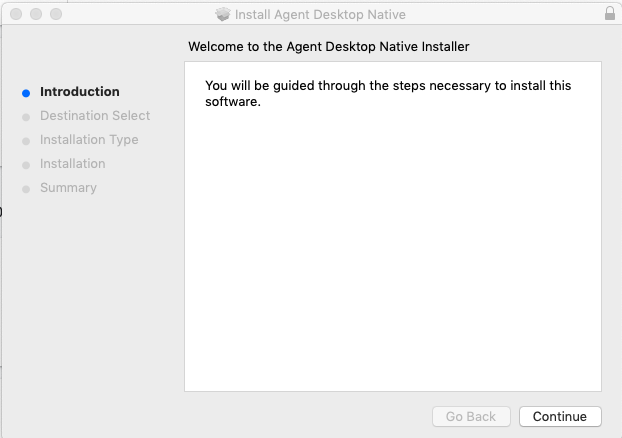
- After downloading the ADN application to the Downloads folder, run the .pkg file to launch the installer.
- Follow the installation on-screen instructions to complete the installation process.
After the installation process is complete, launch the ADN application from the applications folder.
ADN 8.0
Installing the ADN Application in Windows
To install the ADN application on a Windows system, use the following procedure:
- From the Download folder, run the agent-desktop-native-<version>.exe file to launch the installer. The following message appears.
- Click the Yes button to begin the installation process. An Agent Desktop Native Setup window appears.
- The application is installed on your local machine. You can launch the Agent Desktop Native application from the applications folder, or the icon that appears on your desktop:
Installing ADN Application Using the MSI Package
If the Windows administrator prefers to manage bulk installations and upgrades rather than allowing agents to self-service, an MSI package is available for use with typical administration and automation tools. Additionally, you can customize the MSI Transforms (MST) package to pre-populate the client code and other configuration information. The following is an example of using the MSI with an MST and a custom config.json file, to perform a preconfigured administrator install of ADN.
Info
- This type of installation applies only to the Windows platform.
- Contact the LiveVox Customer Care Team for the MSI installer package and the MST overlay. For contact information, go to the LiveVox Customer Care Contacts section in this document.
To install the ADN application using the MSI package, complete the following steps:
- Copy the Microsoft installer package ADN 8.0.msi and config.mst file to a specific folder. For example, C:\temp\ADNInstall\
- Create the config.json file using Notepad. Save the file in the same folder and add {"clientCode":"Value"}to the file. Update the Value field with your appropriate Client code. For example, {"clientCode":"DocU17"}.
- Open the Windows cmd prompt and go the MSI package directory. For example, cd C:\temp\ADNInstall\.
- Execute the following command, as per the required version:
msiexec /i agent-desktop-native-8.0.0.msi TRANSFORMS=config.mst
Info
- After a successful installation, you should find the custom preconfigured config.json in C:\Program Files\Agent Desktop Native.
- The file in this location provides the default settings for ADN, along with any user-level config adjustments, which are saved into C:\Users\username\AppData\Roaming\Agent Desktop Native on a per-user basis.
Installing the ADN Application on a Mac
- After downloading the ADN application to the Downloads folder, run the .pkg file to launch the installer.
- Follow the installation on-screen instructions to complete the installation process.
After the installation process is complete, launch the ADN application from the applications folder.
Utilizing Call and Screen Recording
You can configure call recording and screen recording functionalities through the Jobs tab in the Client window in the LiveVox Portal.

Configuring a Call Recording Job
- Log in to the LiveVox Portal.
- Click Configure > Services > Client. The Client window appears.
- Click the Jobs tab.
- In the Standard Jobs section, click the three-dots menu next to Call Recording. The Configure Call Recording Job window appears.
- Specify values in the fields and select checkboxes as required. Fields with an asterisk (*) indicates required fields:
| Tab | Fields and Descriptions |
|---|---|
| General |
|
| Job History | Displays all standard call recording jobs and their statuses (Success or Failure). |
Configuring a Screen Recording Job
- Log in to the LiveVox Portal.
- Click Configure > Services > Client. The Client window appears.
- Click the Jobs tab.
- In the Standard Jobs section, click the three-dots menu next to Screen Recording. The Configure Screen Recording Job window appears.
- Specify values in the fields and select checkboxes as required. Fields with an asterisk (*) indicates required fields:
| Tab | Fields and Descriptions |
|---|---|
| General |
|
| Job History | Displays all standard screen recording jobs and their statuses (Success or Failure). |
Enabling Administrator-to-Agent and Agent-to-Agent Chat
SmartReach provides the ability for Administrators and Agents to interact with one another through chat functionality within the SmartReach Portal and Agent Desktop. These features need to be enabled:
- Navigate to the Client > Portal tab and select Agent-to-Agent Chat:

- Click Save.
- Chats from Administrators to Agents can be initiated by selecting the Agent from the Monitor tab and clicking Chat:

- Chats from Agent-to-Agent can be initiated within the Agent Desktop by click on the Chat tab:
