
Creating a message allows the administrator to customize the phrases used in a contact flow. For example, if a client has call centers in different cities, you can create a contact flow to be used as a welcome message, but customize the message for different branches.
To create a new message:
- Log in to the LiveVox portal as an administrator.
- Navigate to Configure > Messaging and then click Messages.
The Messages window appears. - Click Add.
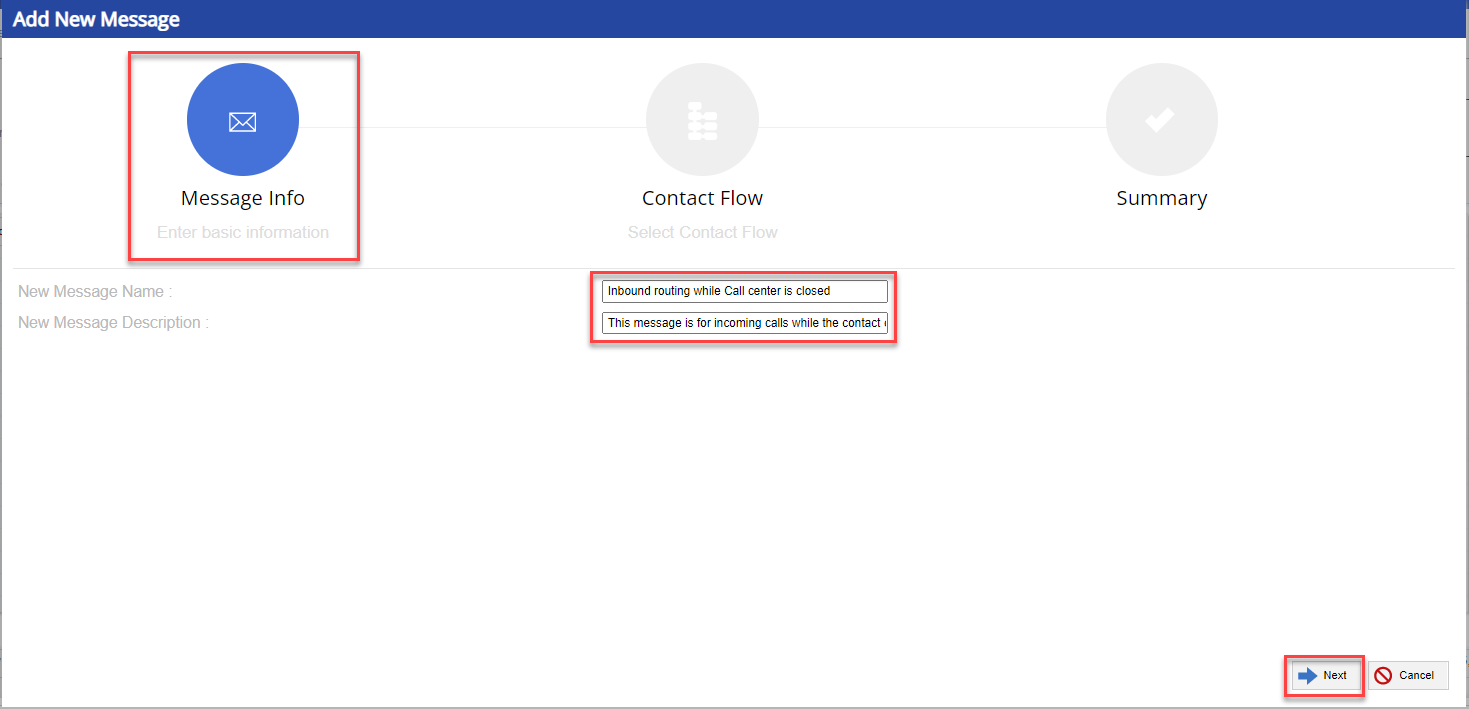
The Add New Message window appears. - In the Message Info screen, specify the following:
- In the New Message Name field, specify the name of the message.
For example, create a message for inbound routing while the call center is closed. Enter Inbound routing while Call center is closed in the New Message Name field. - In the New Message Description field, specify an appropriate description for the message. For example, enter This message is for incoming calls while the contact center is closed.
- In the New Message Name field, specify the name of the message.
- Click Next.
- In the Contact Flow screen, perform the following:
- Filter By: Select the required filter from the dropdown menu to choose the required contact flow. For example, filter by name to find a contact flow for the message Inbound routing while Call center is closed.
- Contact Flow: Select the required contact flow that you want to be attached to the message. For example, search for Call center is closed contact flow from the drop-down menu.
-
Contact Flow Description: The description of the selected contact flow appears.
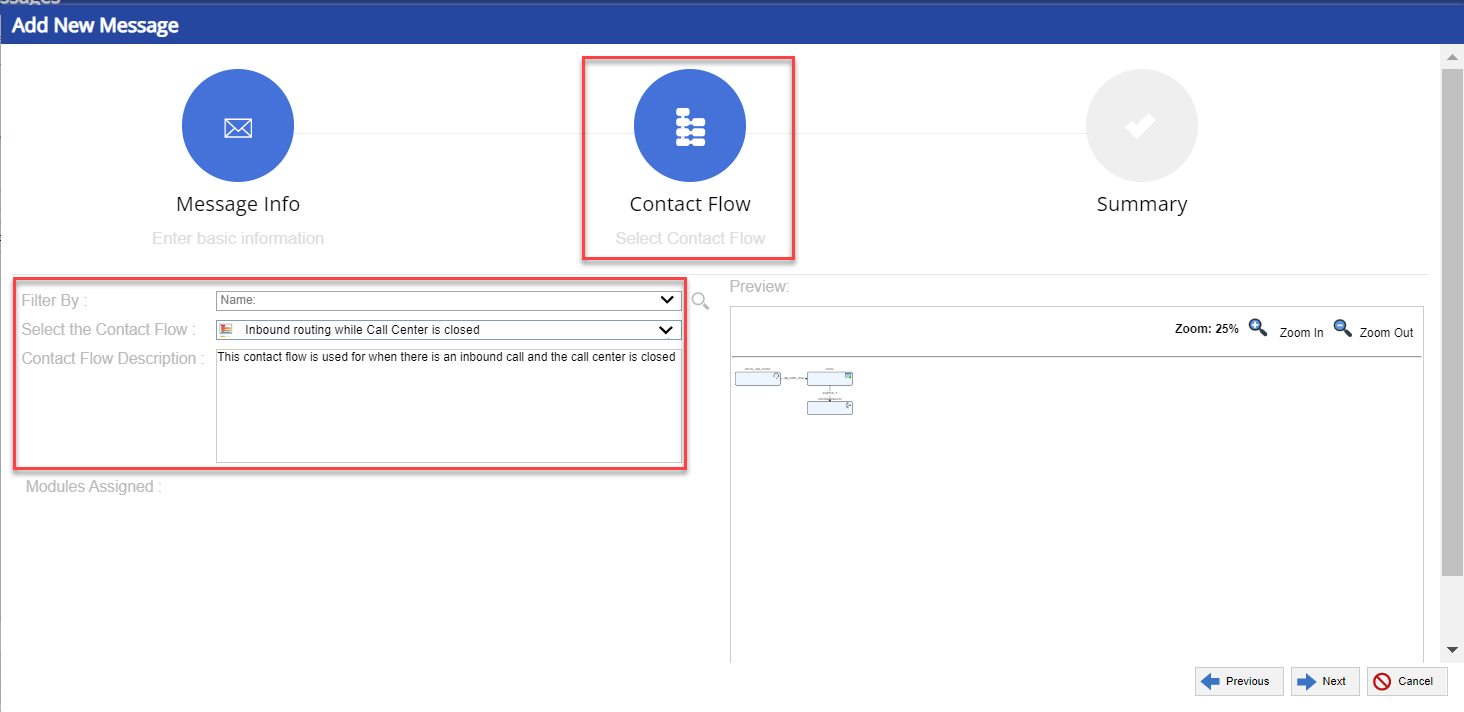
- Click Next.
- In the Summary screen, verify the information..
- Click Save to save the configuration and return to the Messages editor.
The contact flow is added to the new message. - In the Messages editor, click the General tab to view and edit the Property Name and Property Value of each module in the selected contact flow. A property can be an instruction (requiring inputs, such as press 1 or 2) or a phrase (the words to be used in a message).
For example, for the Menu Prompt Phrase property name of the menu module, select I am sorry that our office is now closed property value.
- Click Save to save the message with the new properties.
- Click Deploy. The message is now ready to be used in a service.
Assigning the Message to a Service
To use a message, you must assign the message to a service. You can assign the same message to multiple services. However, the message and the agent must be assigned to the same service for an agent to use the message.
To assign the message to an inbound service:
- Navigate to Configure > Services and then click Services.
The Services window appears. - Select the Call Center to which the service belongs, from the drop-down menu.
- Select the service to which you want to assign the message in the Service drop-down menu.
- Click the Phone Numbers tab and select the required message from the Inbound Message drop-down menu.
- Click Save.
The inbound message is assigned to a service.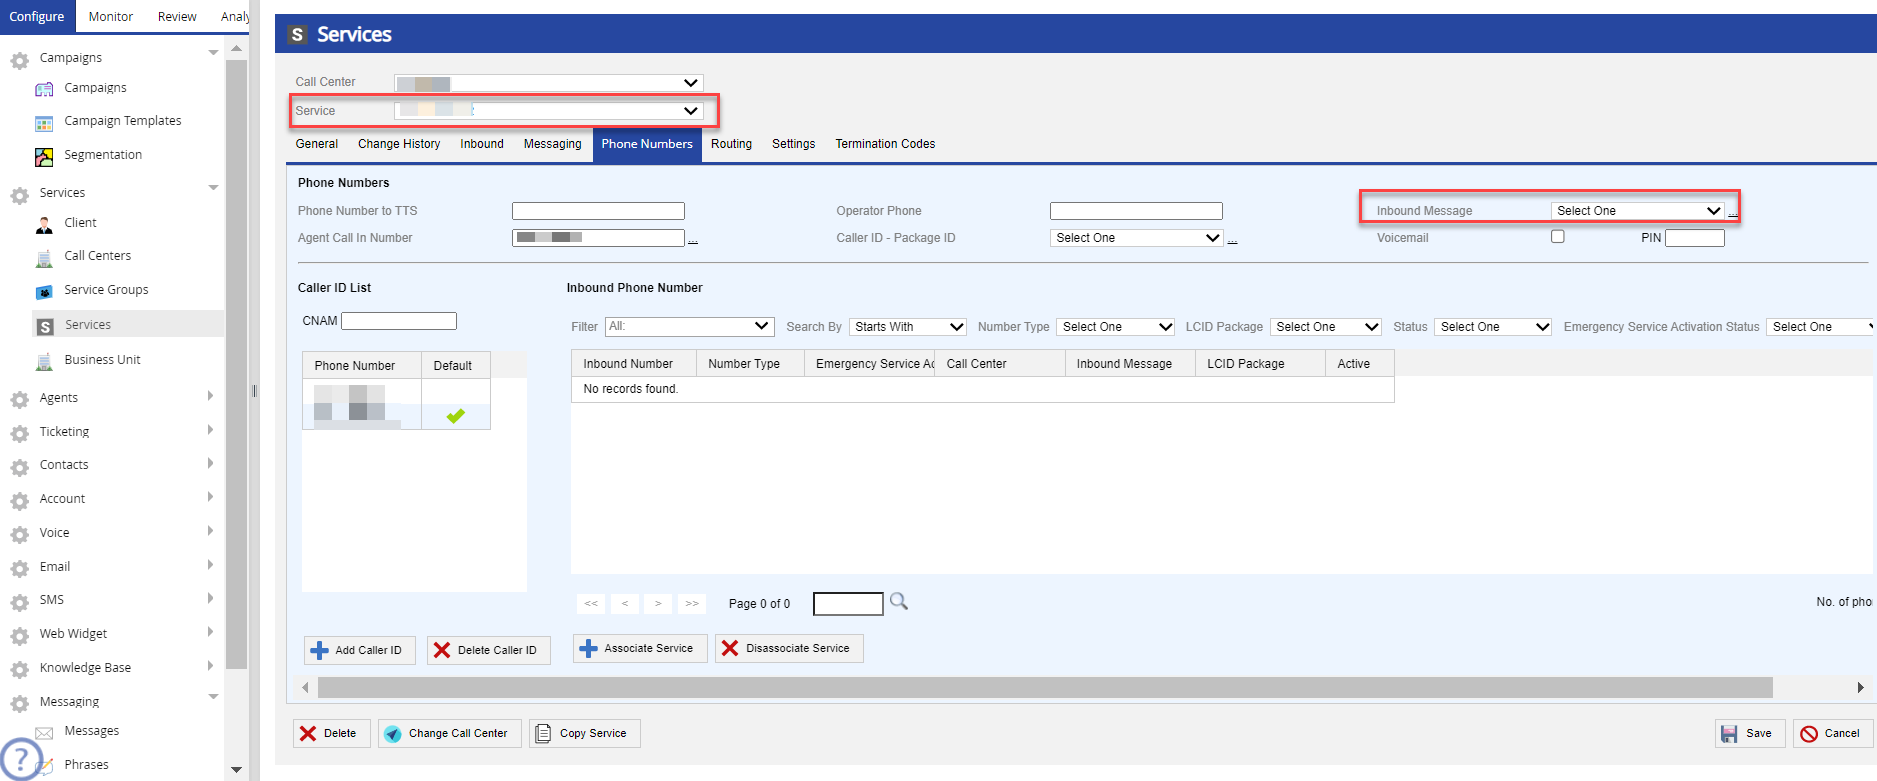
The following video describes how to assign a contact flow to a message and how to assign a message to an inbound service.
To assign the message to an outbound service:
- Navigate to Configure > Services and then click Services.
The Services window appears. - Select the Service to which you want to assign the message in the Service drop-down menu.
- Select the Call Center to which the service belongs, from the drop-down menu.
- Select the service to which you want to assign the message in the Service drop-down menu.
- Click the Messaging tab.
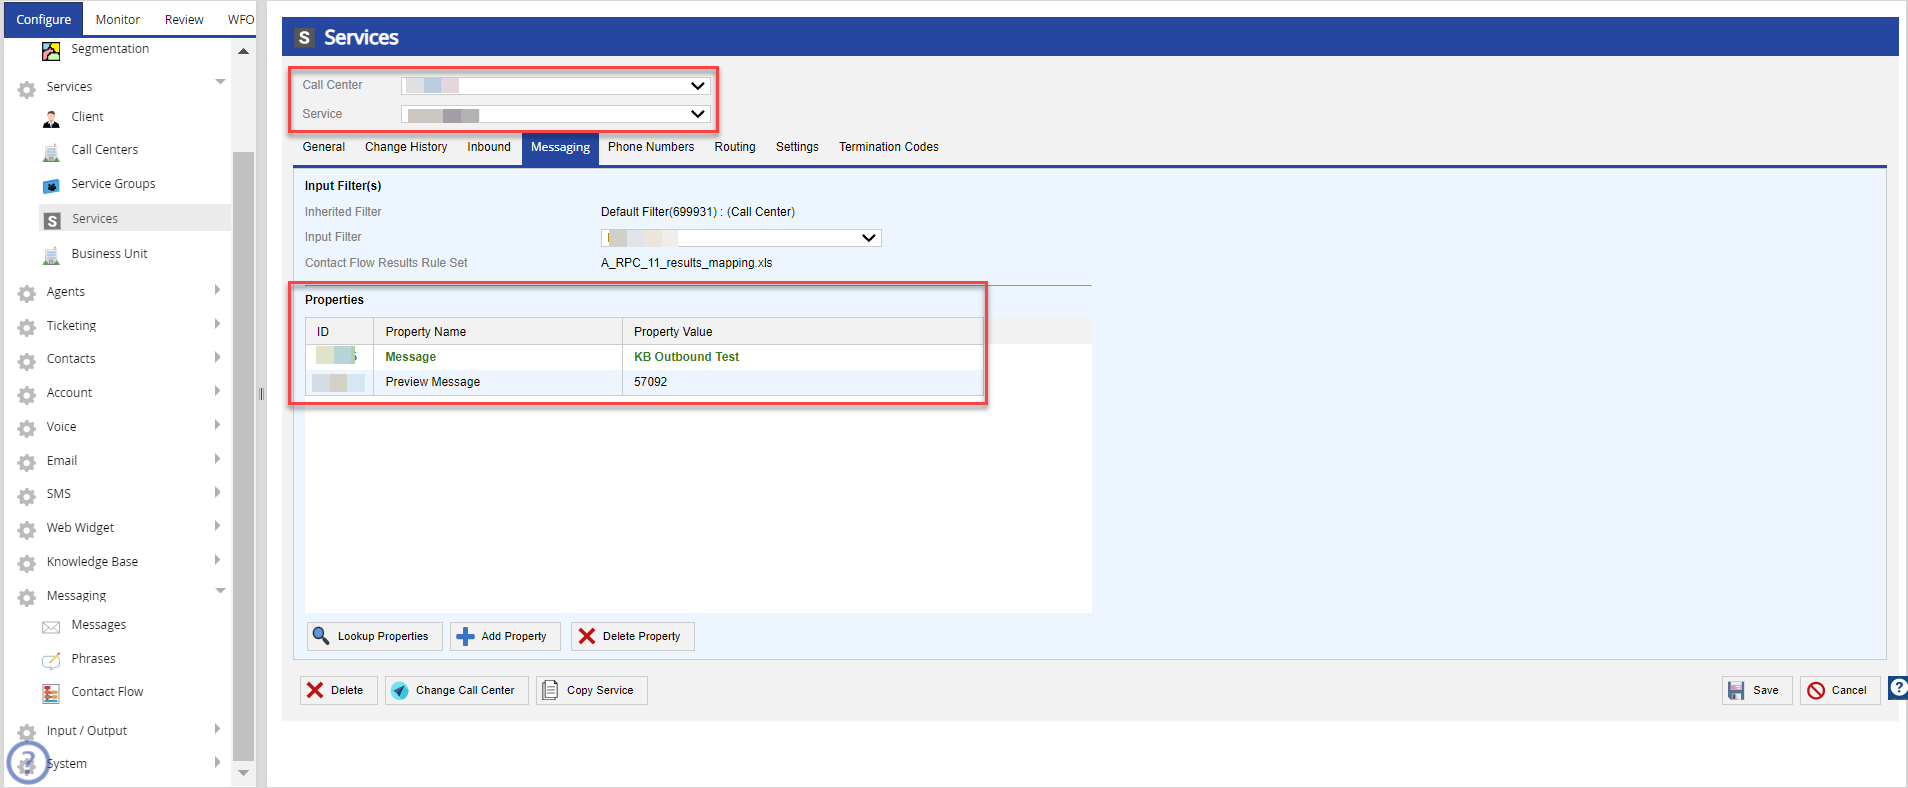
- In the Properties section, double click on Property Name.
The Edit Property(s) dialog box opens. - Choose the required message from the Property Value drop-down menu. Click Ok.

- Click Save.
The outbound message is assigned to a service.