After you create and deploy a message, you must assign it to a service to ensure that the contact flow behaves as expected. This topic describes how to assign a message to inbound and outbound services using the Services editor.
- In the LiveVox Portal, navigate to the Services editor by selecting Configure > Services > Services.
- Select the required Call Center and Service values from their respective drop-down menus.
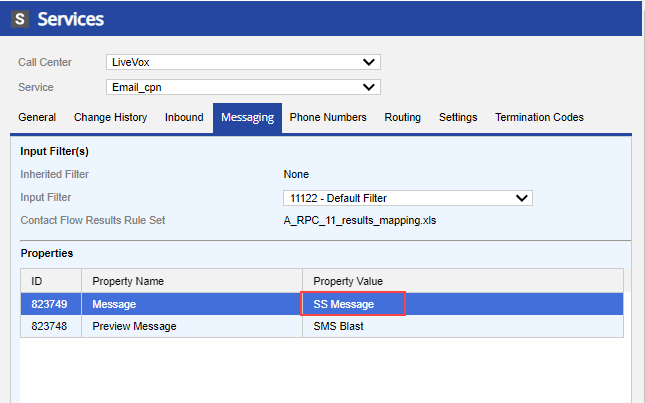
- To assign a message to an outbound service, click the Messaging tab.

- In the Properties table, double-click the Message property field.
- In the Edit Property(s) window, select the required message from the drop-down menu for the Property Value field.
- Click Ok, then click Save.
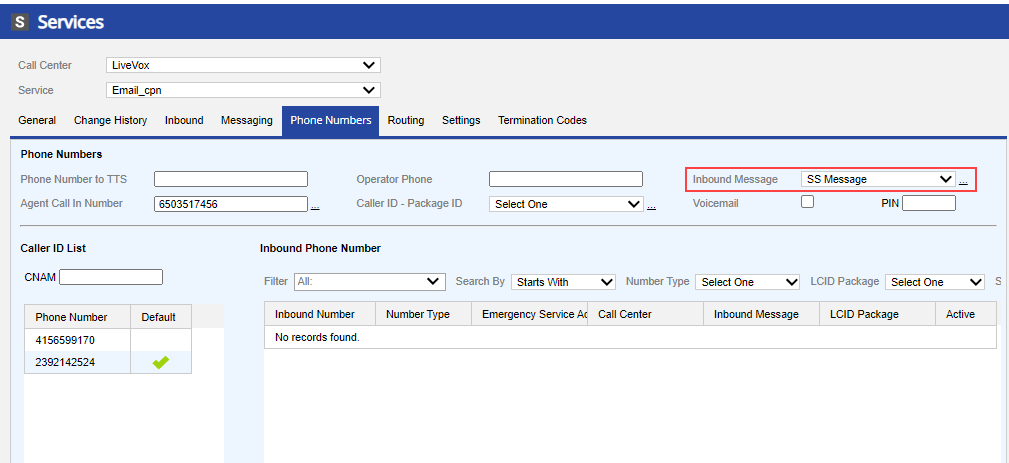
- To assign a message to an inbound service, click the Phone Numbers tab.

- Select a message from the Inbound Message drop-down menu.
- Click Save.
