
You can access the LiveVox / SmartReach agent desktop through a web browser by using a URL or the Agent Desktop Native (ADN) application.
U17
Sign-In Process
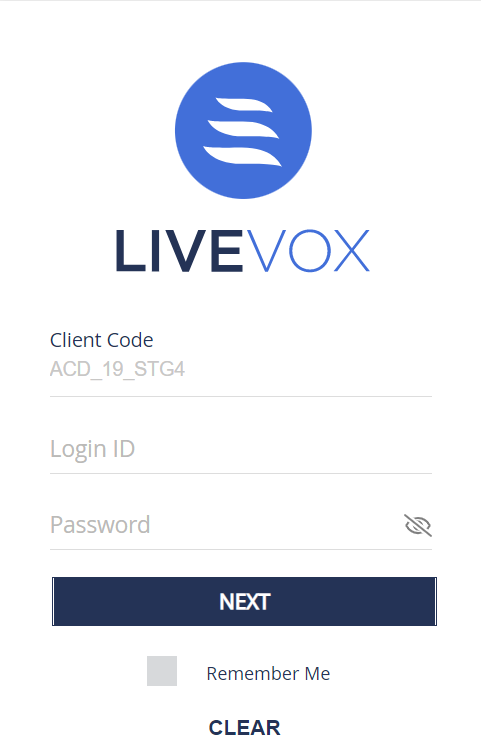
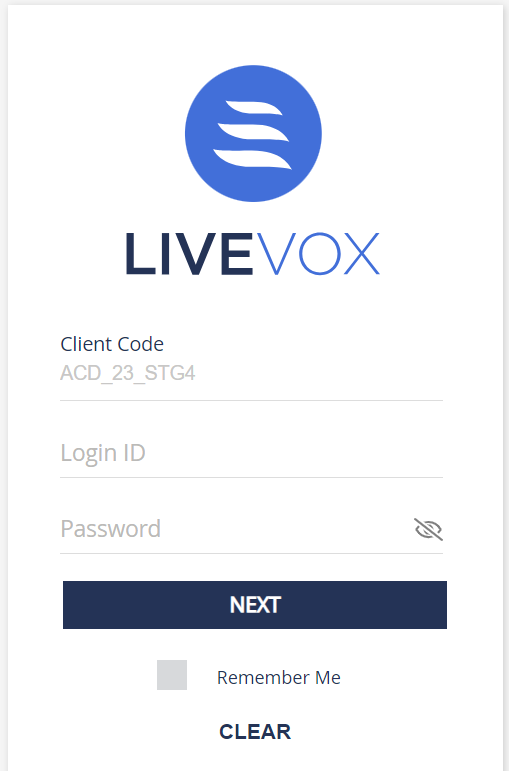
- Go to the LiveVox Agent Desktop URL of your organization (or run the ADN application). The Agent Sign In window appears.
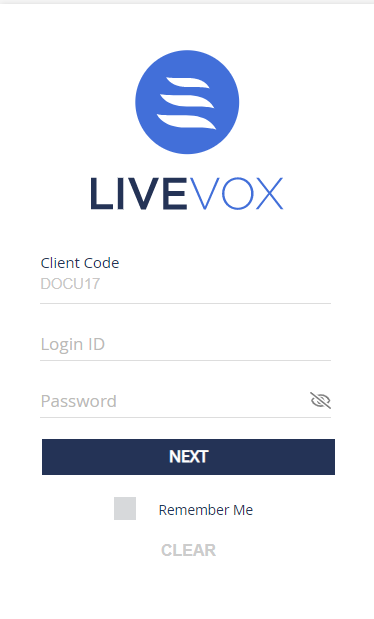
- Specify your Login ID and Password.
- Click Next to sign in to the agent desktop.
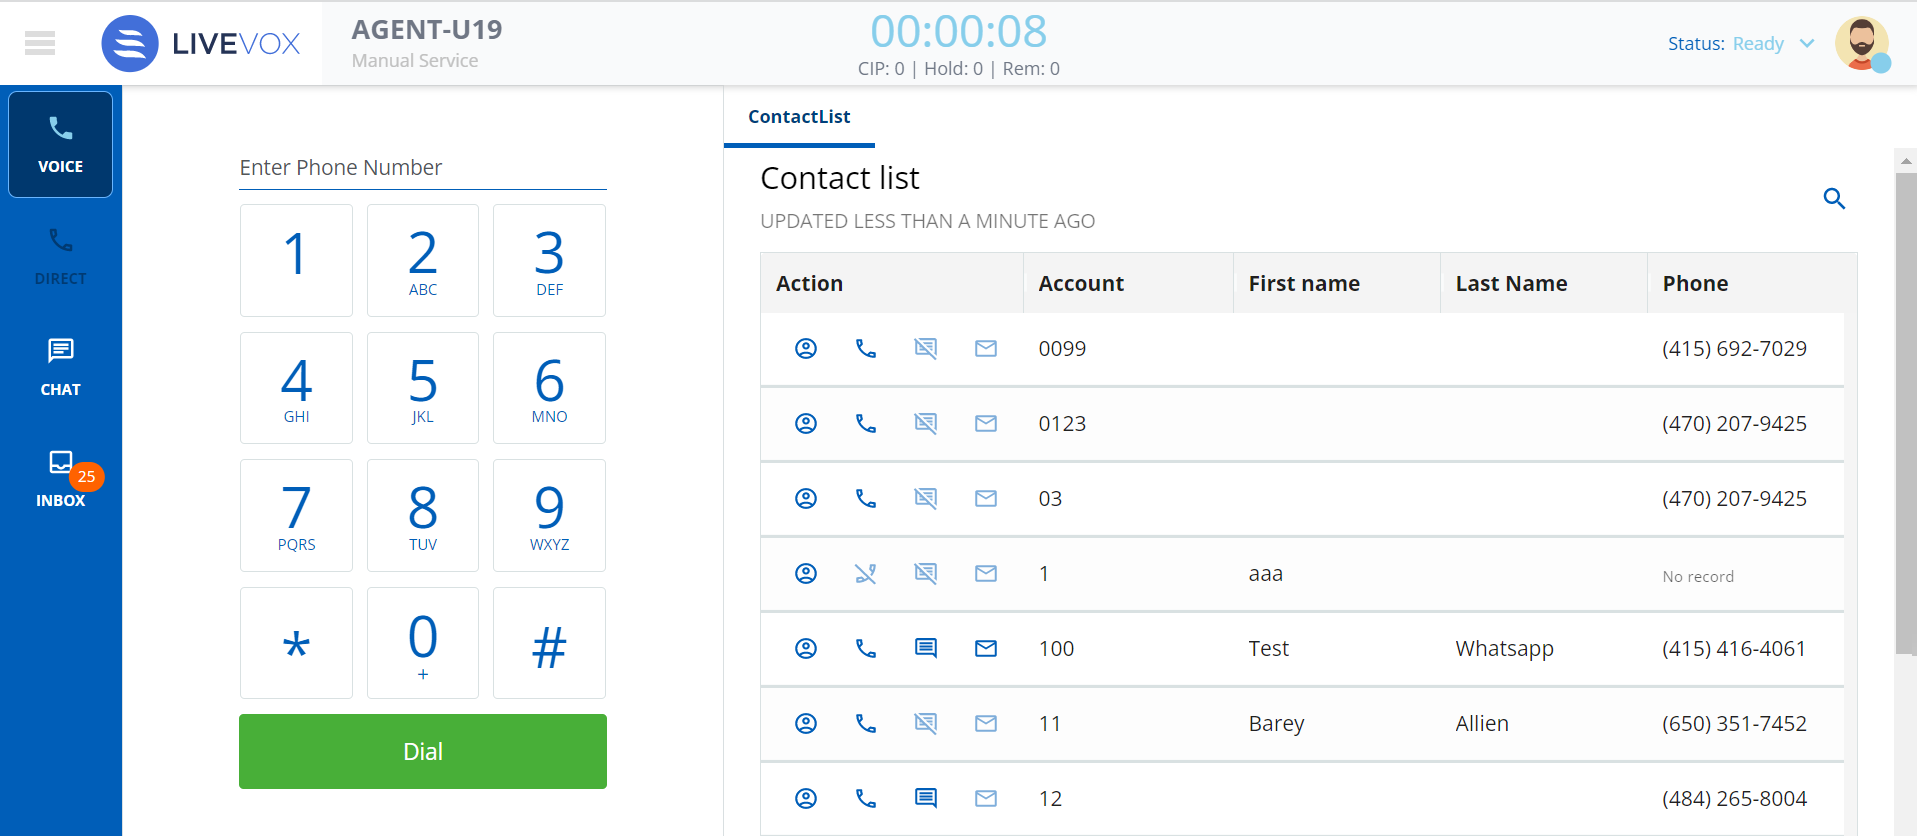
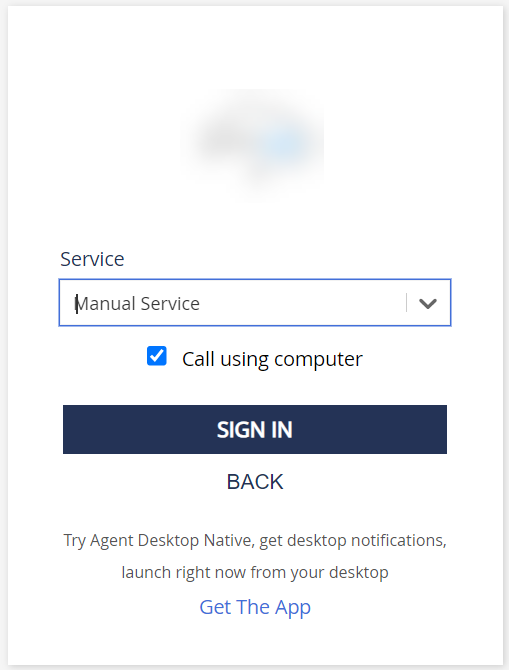
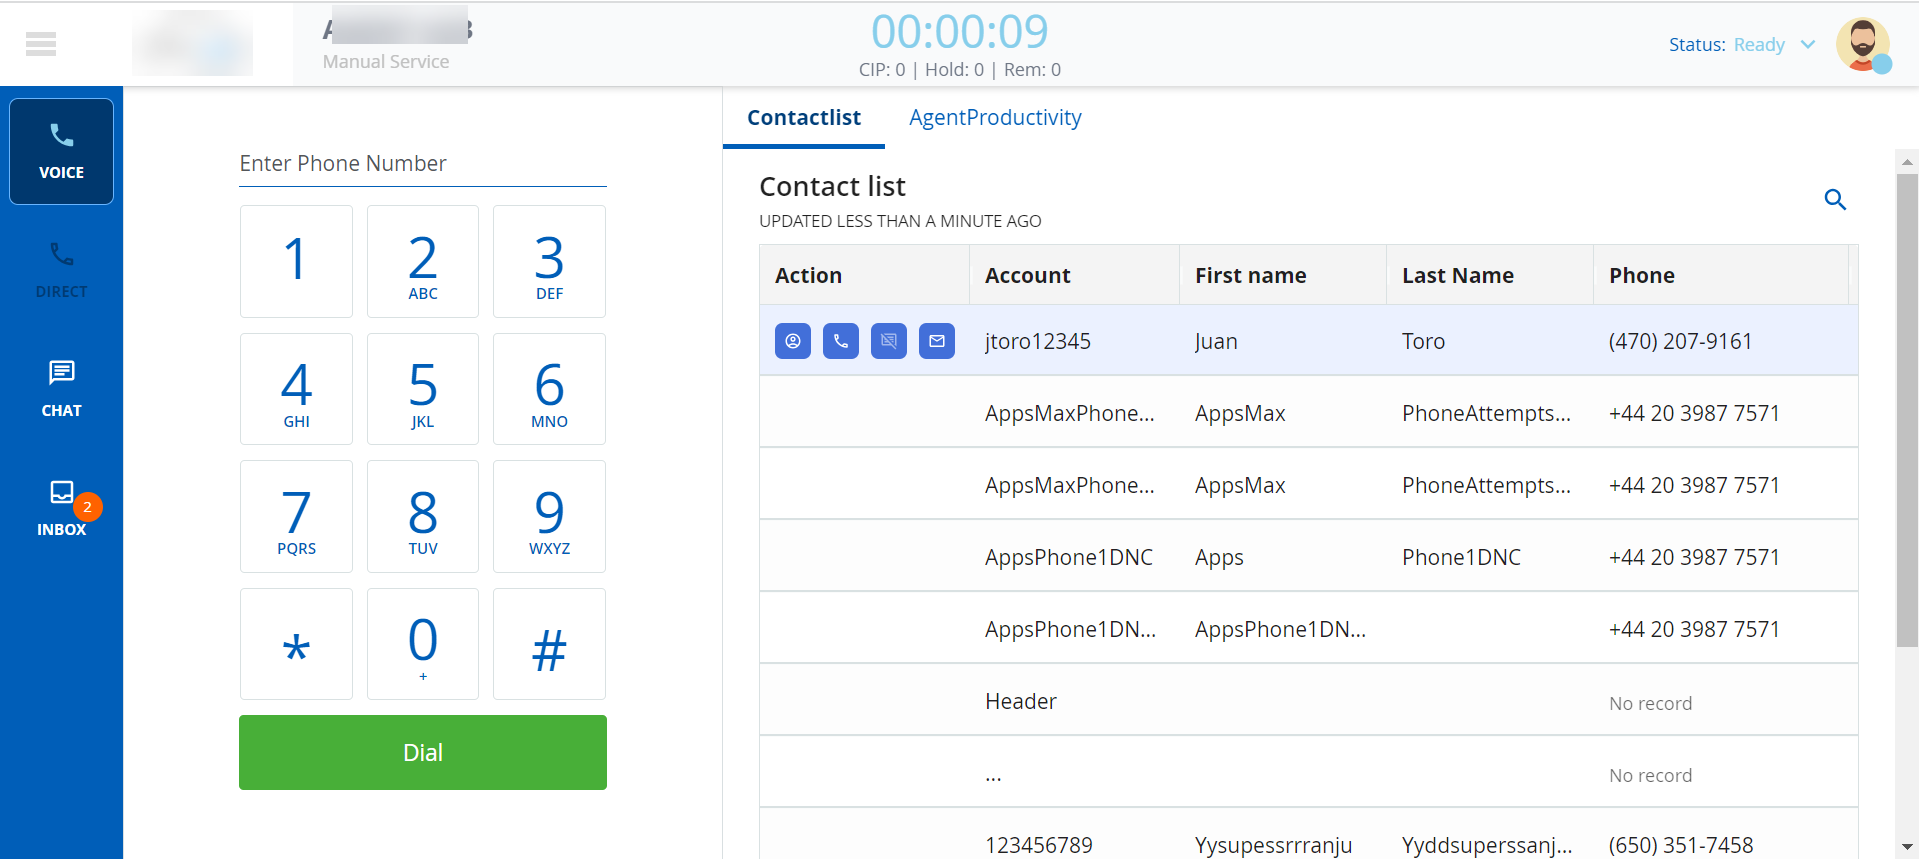
- After you log in to the agent desktop, select a service by clicking the Service drop-down list:
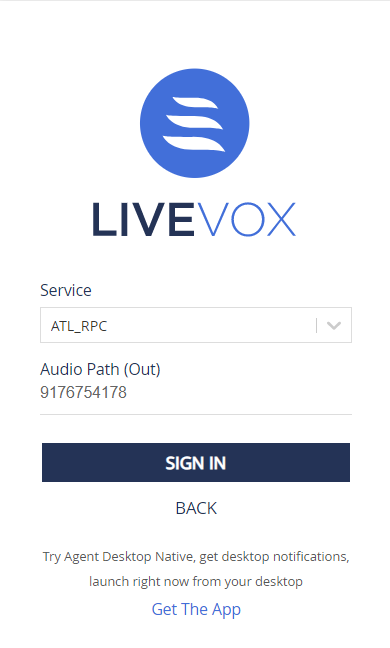
- Establish the audio connection. Depending on the type of service you select, you might have to follow different instructions to establish your audio connection. For more information, see the Establishing Audio Connection article.
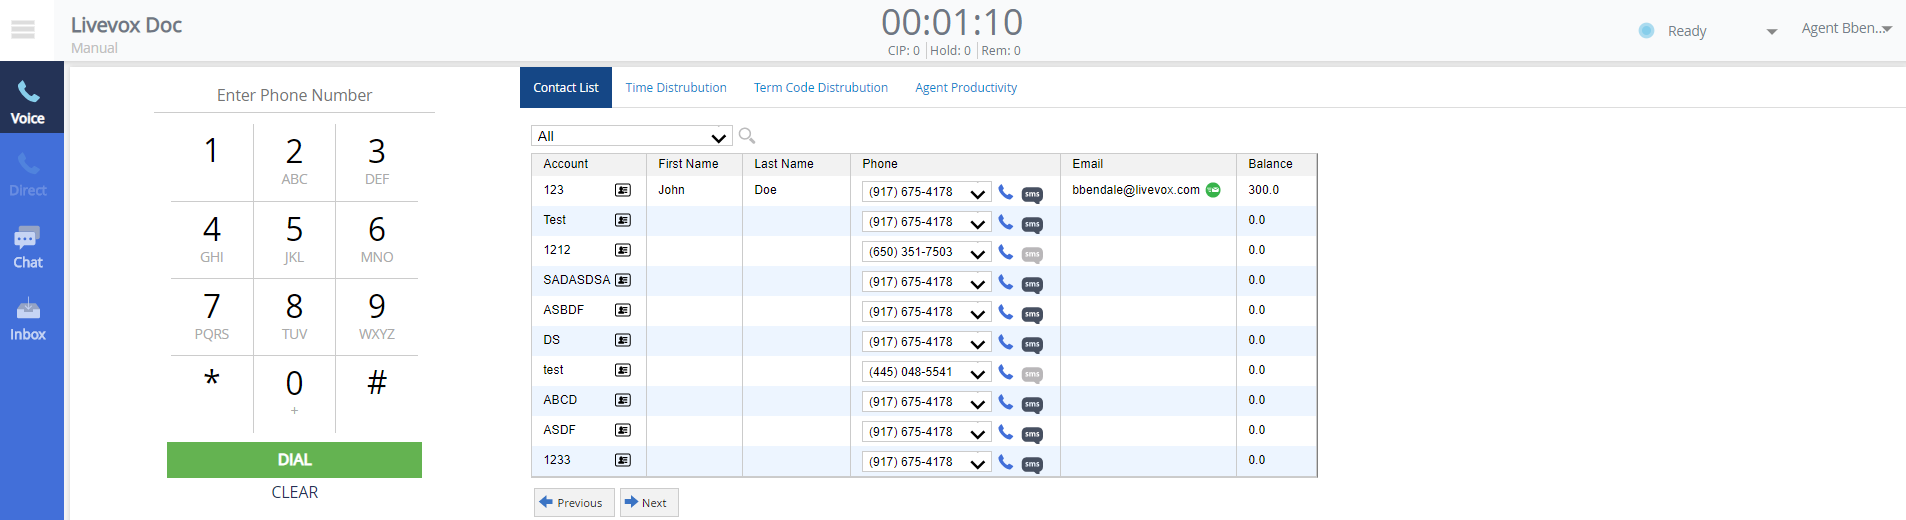
- Depending on your service configuration, you must click the Sign In button or enter a pin. The agent desktop interface appears as per the settings configured by your manager.
LV 19
Sign-In Process
- Go to the LiveVox Agent Desktop URL of your organization (or run the ADN application). The Agent Sign In window appears.
- Specify your Login ID and Password.
- Click Next to sign in to the agent desktop.
- After you log in to the agent desktop, select a service by clicking the Service drop-down list:
- Establish the audio connection. Depending on the type of service you select, you might have to follow different instructions to establish your audio connection. For more information, see the Establishing Audio Connection article.
- Depending on your service configuration, you must click the Sign In button or enter a pin. The agent desktop interface appears as per the settings configured by your manager.
Fall 23
Sign-In Process
- Go to the LiveVox Agent Desktop URL of your organization (or run the ADN application). The Agent Sign In window appears.
- Specify your Login ID and Password.
- Click Next to sign in to the agent desktop.
- After you log in to the agent desktop, select a service by clicking the Service drop-down list:
- Establish the audio connection. Depending on the type of service you select, you might have to follow different instructions to establish your audio connection. For more information, see the Establishing Audio Connection article.
- Depending on your service configuration, you must click the Sign In button or enter a pin. The agent desktop interface appears as per the settings configured by your manager.
Fall24
Sign-In Process
- Go to the LiveVox Agent Desktop URL of your organization (or run the ADN application). The Agent Sign In window appears.

- Specify your Login ID and Password.
Note
- The Login ID is your Agent ID. The Password is case-sensitive.
- You may be required to change your password upon sign-in. See the Changing Your Password section in the Agent Guide for instructions on updating your password.
- Click Next to sign in to the agent desktop.
- After you log in to the agent desktop, select a service by clicking the Service drop-down list:
-
 Establish the audio connection. Depending on the type of service you select, you might have to follow different instructions to establish your audio connection. For more information, see the Establishing Audio Connection article.
 - Depending on your service configuration, you must click the Sign In button or enter a pin. The agent desktop interface appears as per the settings configured by your manager.
