
Segmentation is the process of filtering the contacts within a large parent campaign into segments (smaller sub-campaigns) so that certain customers can be contacted based on your targeting strategy.
To create a new segment within a campaign:
- In the LiveVox Portal, navigate to the Segmentation tool by selecting Configure > Campaigns > Segmentation.
- Click Add in the Segmentation panel. The Add Segmentation screen appears.
- Specify the required segmentation settings.
Define Segmentation Settings
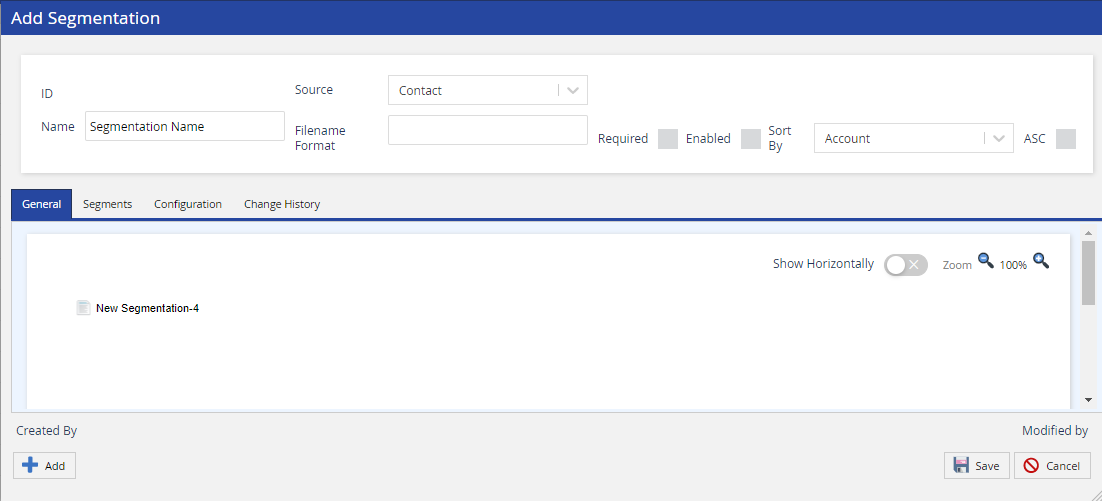
DeleteField Description ID This field is auto-populated by the system after you save the segmentation. Name Enter the name of the segmentation. Source Select Transaction for file-based campaigns from the Campaigns editor.
Select Contact for contact campaigns from Contact Manager.
You can use a Contact segmentation as a segmentation template in Contact Manager to filter a list of contacts.Filename Format Specify the file name to which the segmentation applies. The asterisk character * acts as a wildcard.
If the campaign file name matches this field value during the campaign upload process, a notification appears stating this information and the campaign settings are automatically updated to reflect the configuration in the segmentation.Required Define whether the filename convention must apply to uploaded campaigns.
If unchecked, you can apply the segmentation to any uploaded campaign.Enabled Select the checkbox to make the segmentation rule available to campaigns. Sort By This field appears only if the segmentation Source type is Contact.
You can sort the Segmentation or Segment records in ascending or descending order.- Select the required value in the Sort By drop-down list.
- Select the ASC checkbox to sort records in ascending order.
- Clear the ASC checkbox to sort records in descending order.
General View the segmentation and its segments in graphical form. Segments View and rearrange the order in which the segments must be prioritized and applied. To copy a segment, hover over the segment row and click the Copy icon. Configuration Define the settings that must apply to an uploaded campaign if segmentation is enabled. Change History View a tabulated list of changes made to a segmentation. - Click Add in the Add Segmentation screen. The Add Segment screen appears.
- Specify the segment name, description, disposition, rules, and configuration.
Define Segment Settings
A segment is a group of rules that filters a campaign into a sub-campaign.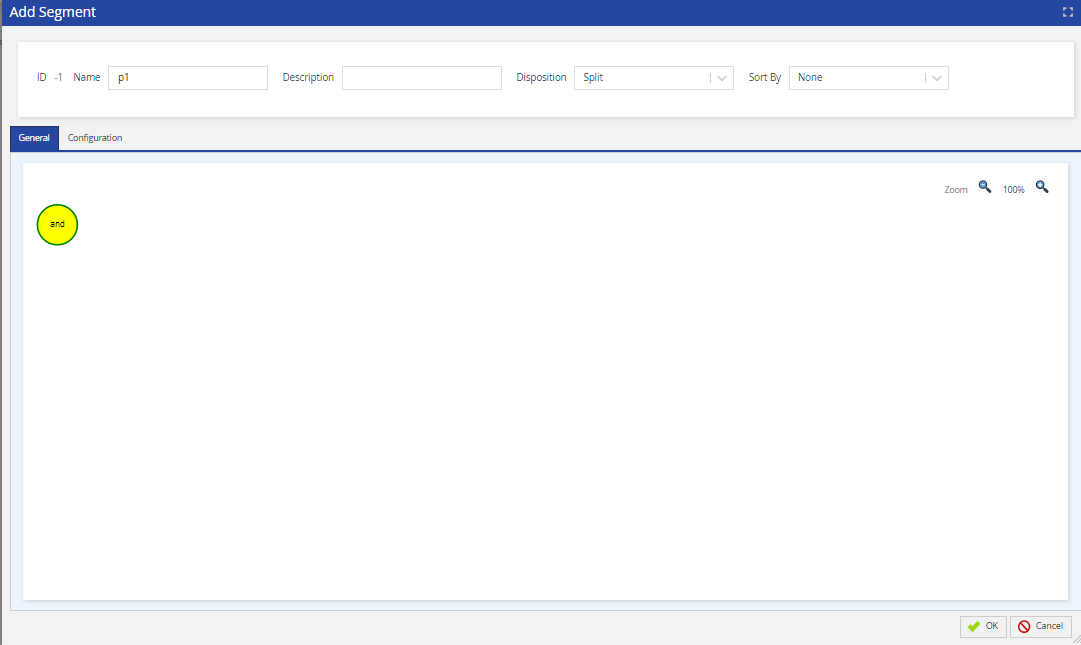
DeleteField Description ID This field is auto-populated by the system. Name Specify the segment (sub-campaign) name. Enter '[' to include any of the following special values: - Four Digit Year - [YYYY]
- Two Digit Year - [YY]
- Month - [MM]
- Day - [DD]
- File Name Without Extension -[FN]
- File Extension - [EXT]
Description Enter a description of the segment. Disposition Define whether records should remain with the original campaign.
Split: Includes records matching the segment
Exclude: Excluded records remain with the original campaignGeneral Add segment rules. For more information, see the Set segment rules in this topic. Configuration Schedule a segment. For more information, see Schedule a segment in this topic. Set Segment Rules
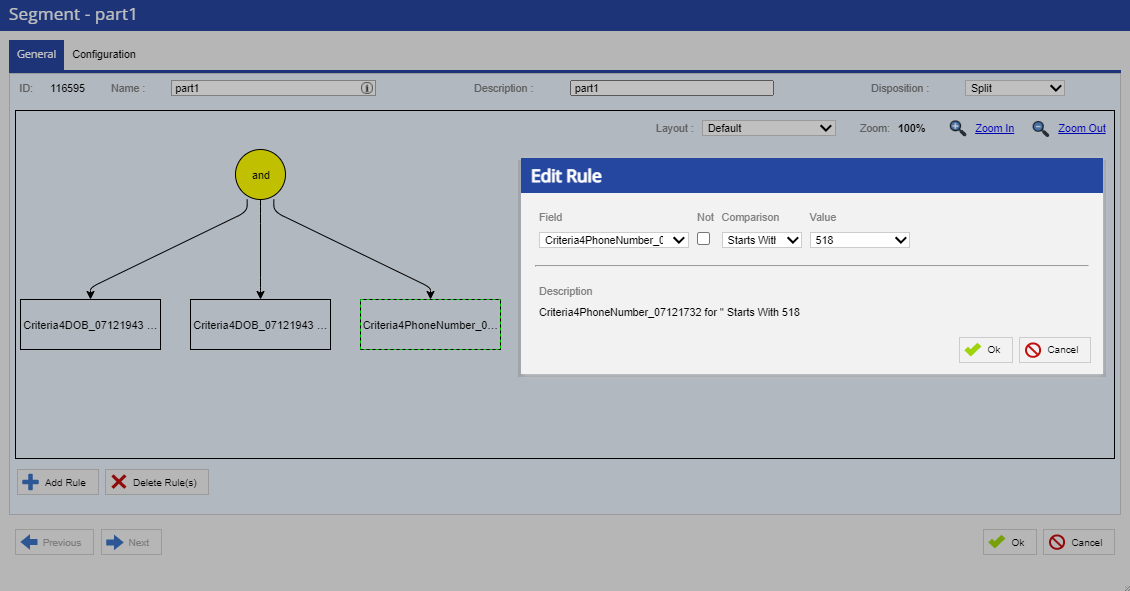
Segment rules define conditions by which contacts are filtered into a segment.
To add a segment rule:- Click and drag the and operator icon in the General view of the Add Segment screen. The Add Rule screen appears.
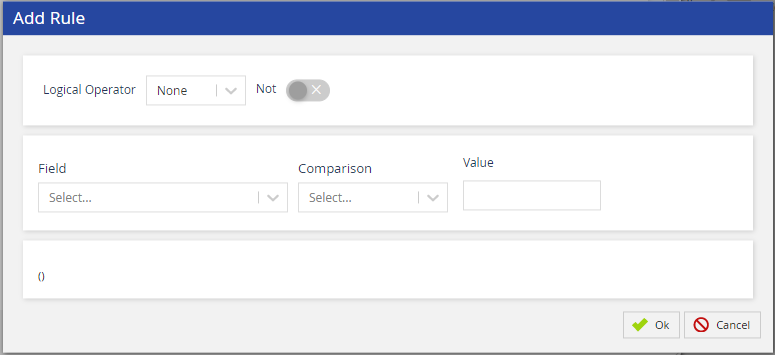
- Define the parameters of the rule.
Field Description Logical Operator Select a logical operator (and/or).
Not negates the specified logical operator.Field Select a contact or transaction field from the drop-down menu to define the condition. Comparison Select the relational operator for the rule. The options depend on the data type specified for the field. - In
- Not In
- Starts With
- Contains Regex or Regular Expression. When basic matches do not work, you can write a regular expression. Regular expressions (regex or regexp) are extremely useful in extracting information from any text by searching for one or more matches of a specific search pattern (i.e. a specific sequence of ASCII or Unicode characters).
- Equal to
- Ends With
- Is Null
- Is Not Null
- > Greater than
- < Less than
- = Equal
- >= Greater or equal
- <= Less or equal
- != Not equal to
- Is Null
- Is Not Null
Value Specify the corresponding values for the selected criteria. - Click Ok to save the rule.
Schedule a Segment
Select the Configuration tab of the Add Segment window to define sub-campaign settings and schedule the segment.
To delete a segmented campaign configuration, hover over the configuration row and click the Delete icon that appears.FieldDescriptionSelect the campaign type (Outbound, SMS, HCI, 10DMT, Messaging, and HTI) from the drop-down menu.Campaign SubType This field appears if the value in the Campaign Type field is Messaging. Select the type of messaging (for example, WhatsApp).
Select the service on which you want the campaign to run. You can also search for a service by its name, call center, type, and preview mode by clicking the magnifying glass icon.Operator PhoneThis field appears if the value in the Campaign Type field is 10DMT, HCI, HTI, or Outbound.Enter the number that you want the LiveVox platform to first dial for tethering extension-based agents into the system.Caller IDThis field appears if the value in the Campaign Type field is 10DMT, HCI, HTI, or Outbound. Select the number from which you want the customers to be called.The options in the Caller ID field are determined by the value in the Caller ID Source ID field on the Settings tab of the selected service.Callback PhoneThis field appears if the value in the Campaign Type field is 10DMT, HCI, HTI, or Outbound. Enter the number that you want your customers to dial if they want to contact you—this is the number that you want to leave on their answering machines.The type of the Callback Phone field (that is, disabled or drop-down list box) is determined by the value in the Callback Phone Source ID field on the Settings tab of the selected service.To add or modify the pre-defined caller ID phone numbers displayed by the service, contact the LiveVox Customer Care Team.This field appears if the value in the Campaign Type field is 10DMT, HCI, HTI, or Outbound. Select the voice that you want to be used in the calls.The list of possible voice talents includes:- Bob: American Male
- Claudine: French Canadian Female
- Gisele: Portuguese Female
- Gruff F: American Female
- Gruff M: American Male
- Juanita: Spanish Female
- Julie: American Female
- Kate: British Female
- Lee: American Male
- Scarlet: South American Female
AM OptionThis field appears if the value in the Campaign Type field is 10DMT, HCI, HTI, or Outbound. Select the answering machine (AM) option that you want to be used for the calls.The default value in the AM Option field is the same as that in the AM Option field on the Settings tab of the selected service. Depending on the configuration, this field contains the following options:- Don't Leave Messages: If an answering machine is detected, does not allow you to leave a message and disconnects the call.
- Leave Messages: Detects answering machines and leaves a message.
- Transfer all Connections: Does not detect answering machines and transfers all connections to agents.
Select the strategy that you want to be used for contacting the phone numbers.FromThis field appears if the value in the Campaign Type field is Email. Select the name of the email address from which you want the emails to be sent to your customers.This field appears if the value in the Campaign Type field is Messaging or SMS. Select the template that you want to be used in the SMS or WhatsApp message.ScrubThis setting denotes the wireless segmentation options for the selected service. This setting is configured in the Settings tab of the Client editor. Select one of the following values:- None: Does not scrub (remove) any phone number.
- Wireless: Scrubs all wireless numbers so that all landline numbers are contacted.
- Landline: Scrubs all landline numbers so that all wireless numbers are contacted.
- Segmented Wireless: Enables you to use different contact strategies based on the position of a phone number to contact both landline numbers and wireless numbers from the same campaign. All wireless numbers from positions 1 through 15 are scrubbed and start from position 16.
Allow AppendSelect the check box to allow this campaign to be added/appended to an active campaign using the Campaign API. ScheduleSet up unique schedules for different days in the Schedule panel on the right.- On Demand: Select this option to manually control the campaign's dialing. Specify the days of the week you want to set up a schedule for by selecting or deselecting the desired days.
-
Schedule a run: Select this option to schedule the segmented campaign. By default, the campaign is scheduled to start running immediately after it is uploaded (as indicated by the selected ASAP checkbox) and stop running when one of the following criteria is met (as indicated by the selected End of Day checkbox):
- The contact window (based on compliance policies) ends.
- When all the phone numbers in the campaign have been contacted.
- When the campaign is manually stopped.
Delete - Click Ok to complete the segment setup.
- Repeat Steps 4-6, as required.
- After all the segments are set up, click Save in the Segmentation panel to complete the segmentation process.
To reorder segments with similar settings, select a segmentation row and use the vertical arrow buttons in the Segmentation window. Click Save when the correct order is set.